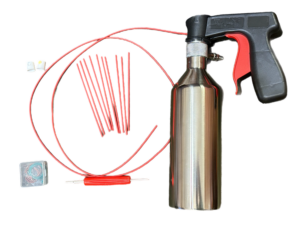
TANK NOT HOLDING PRESSURE
As our product page explains, be sure to “test” your new POWER INJECTOR with nothing but water before loading it with mixed chemicals. These systems should securely contain and hold air up to 90 PSI and not leak when charged.
If you hear air escaping or note a leak after charging the system for the first time, check to see if you can identify where the air/leak is releasing.
WHERE TO CHECK FIRST – THE TANK SEAL
There are two likely locations and both are easy to troubleshoot. This will only take a moment and in most cases, can be fixed on the spot.
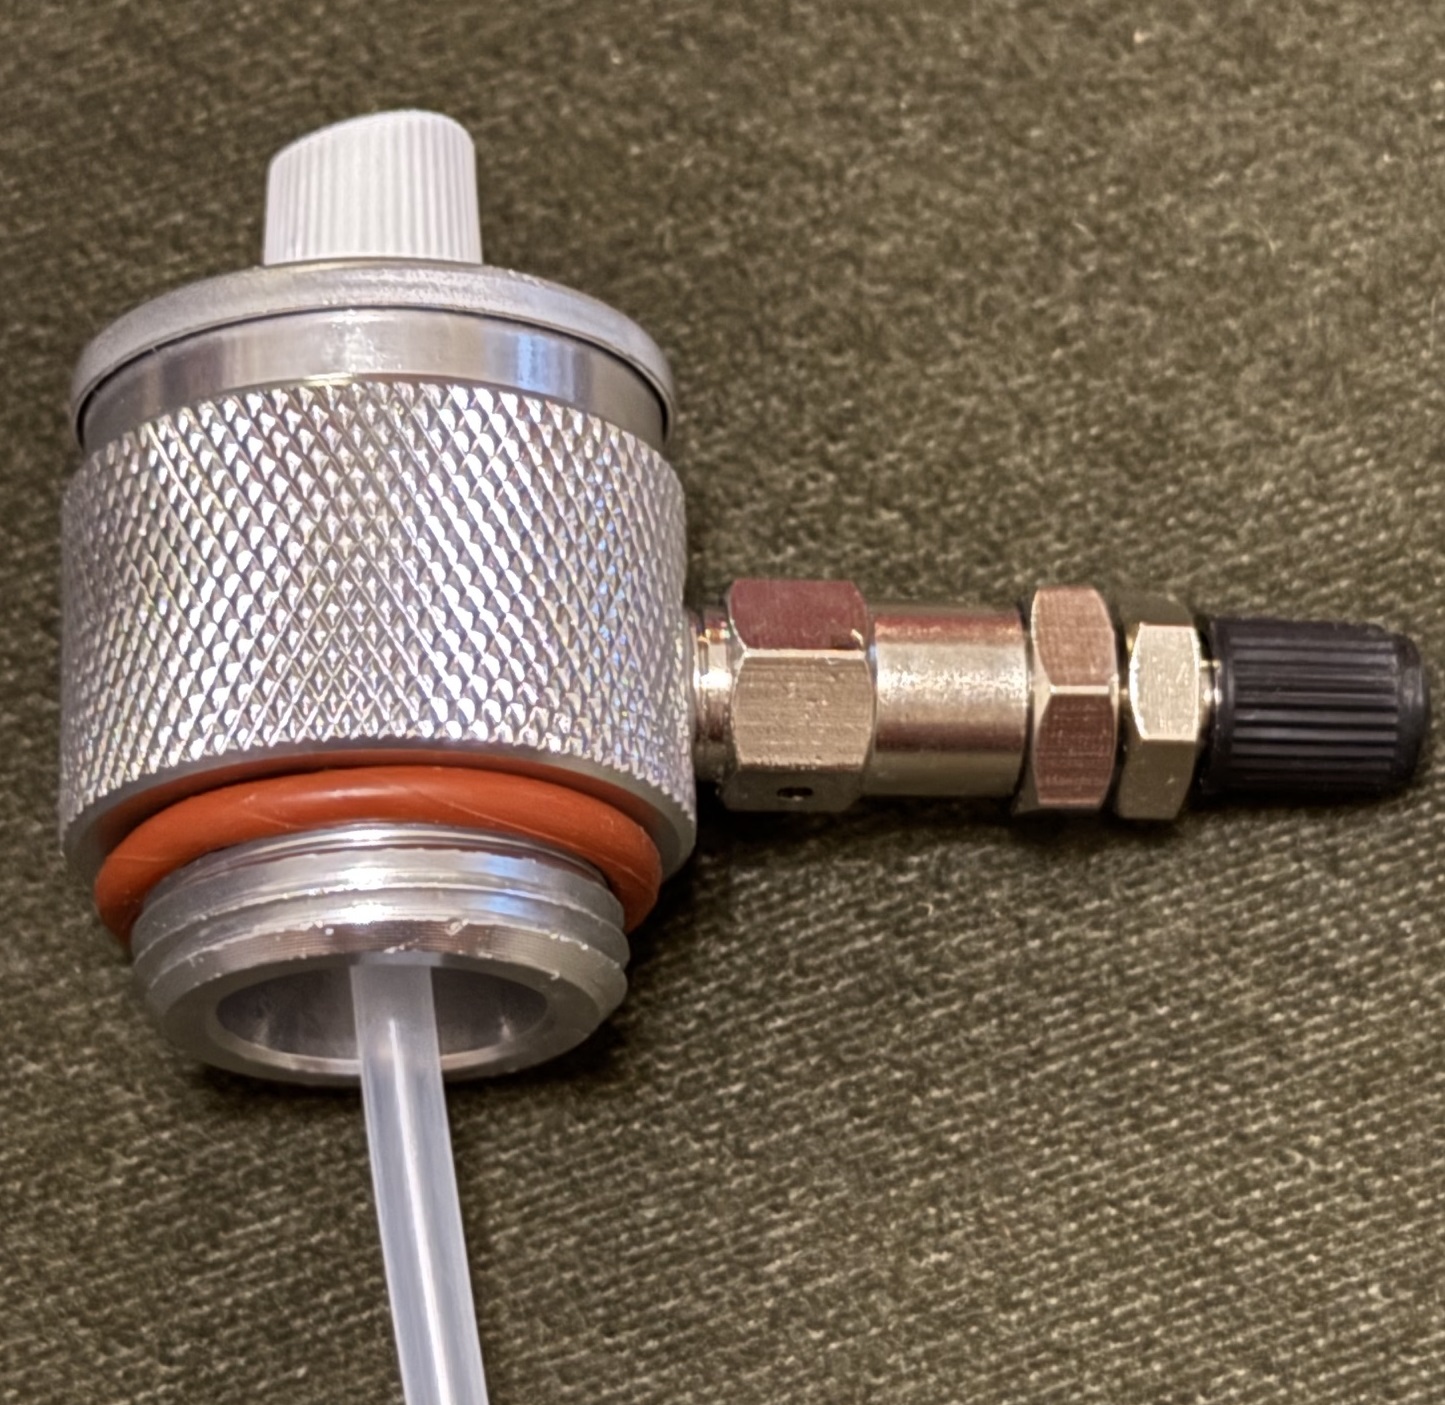
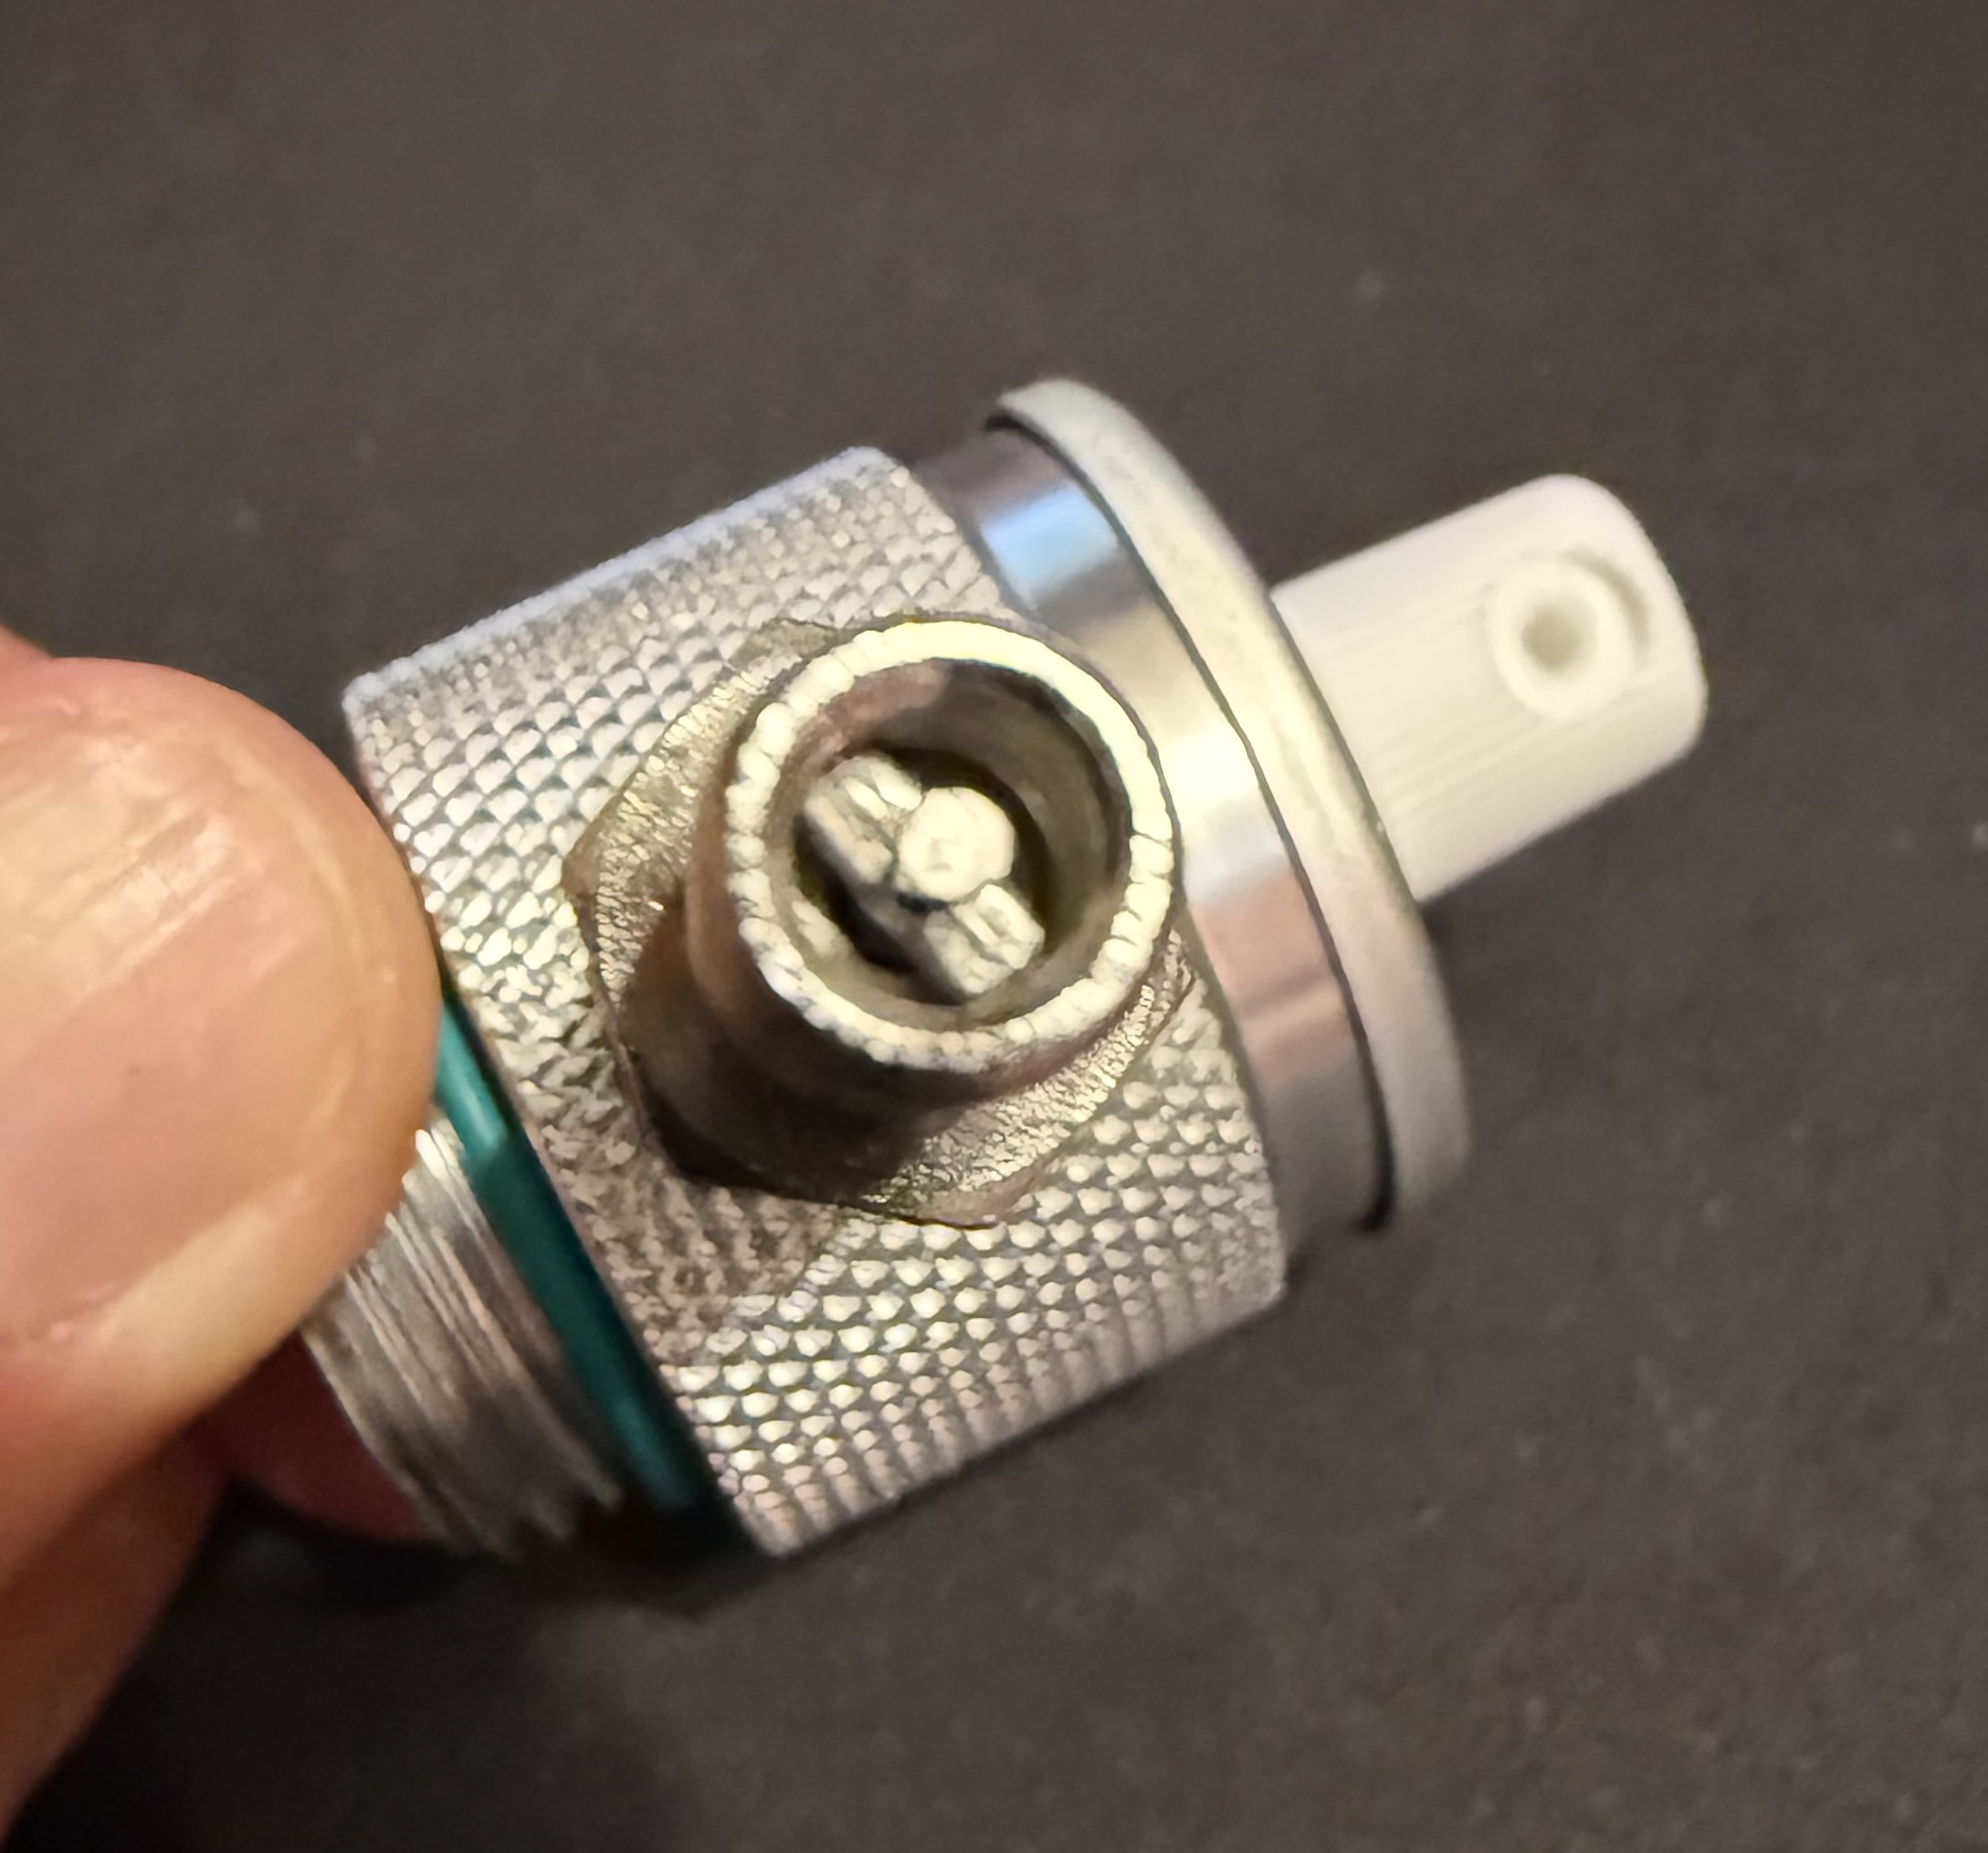
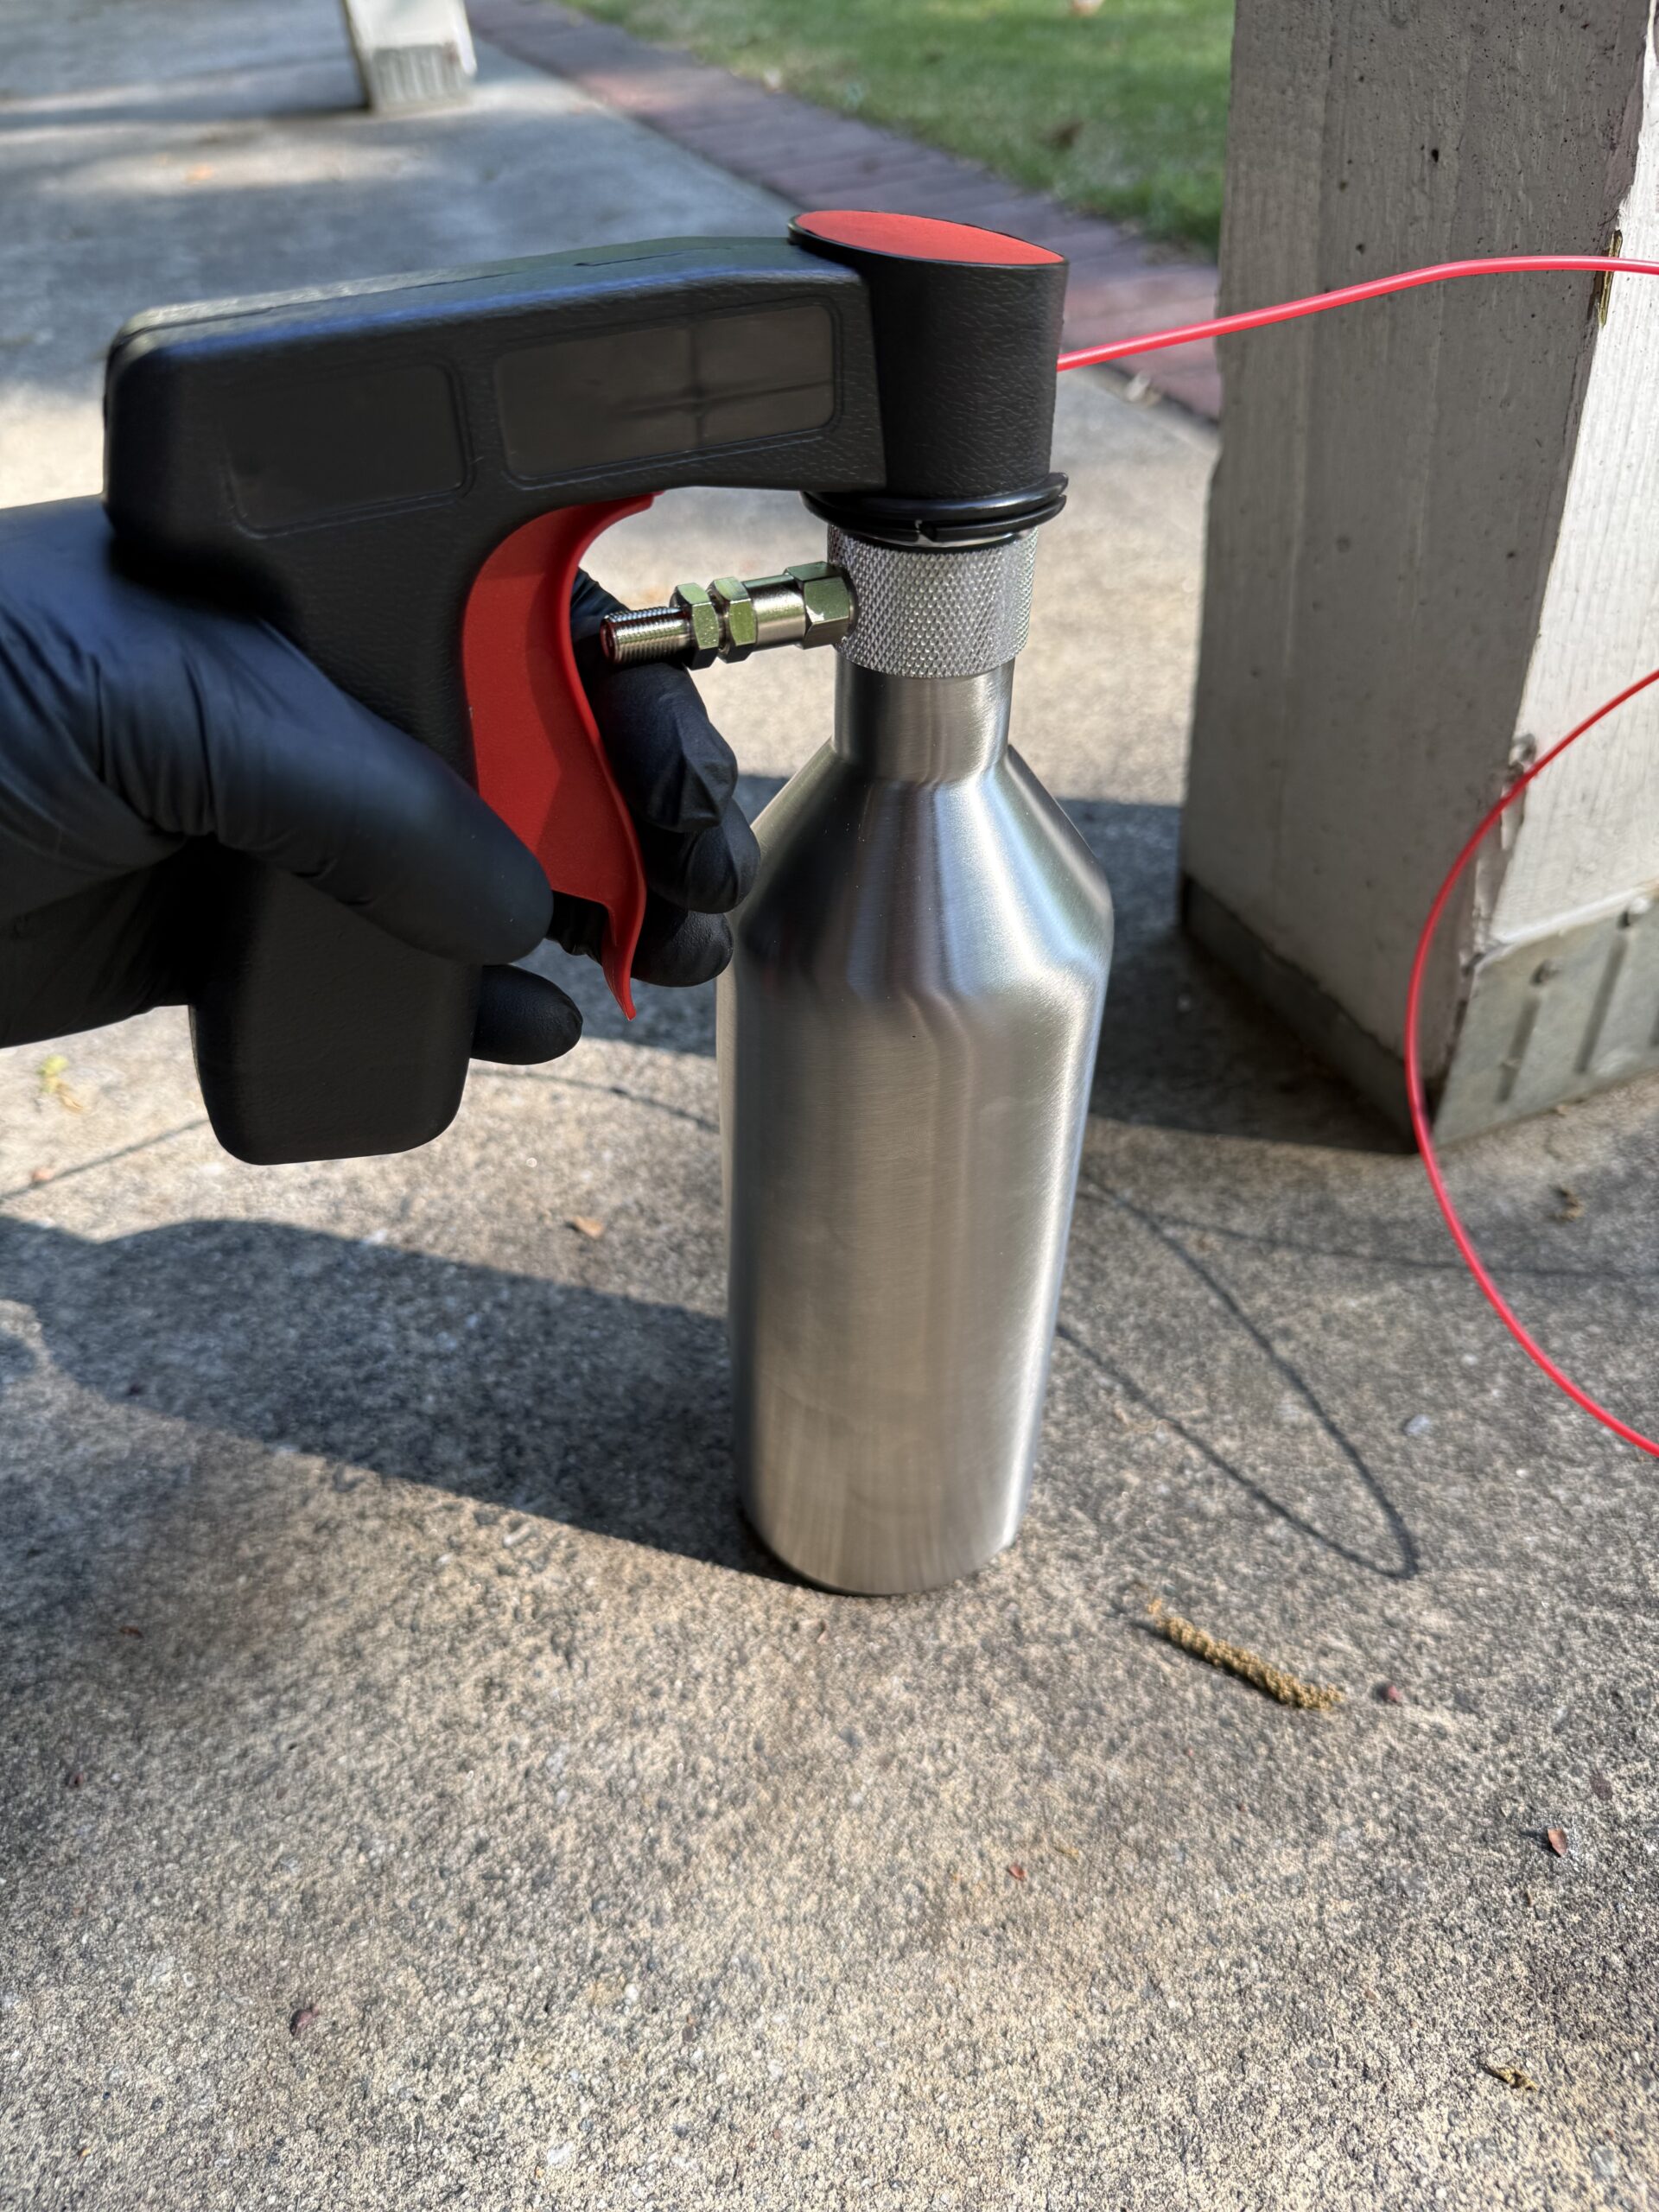
The first area to check is the seal that sits under the spray system. The Spray System screws “into” the tank’s threaded neck and see if has a green O-Ring.
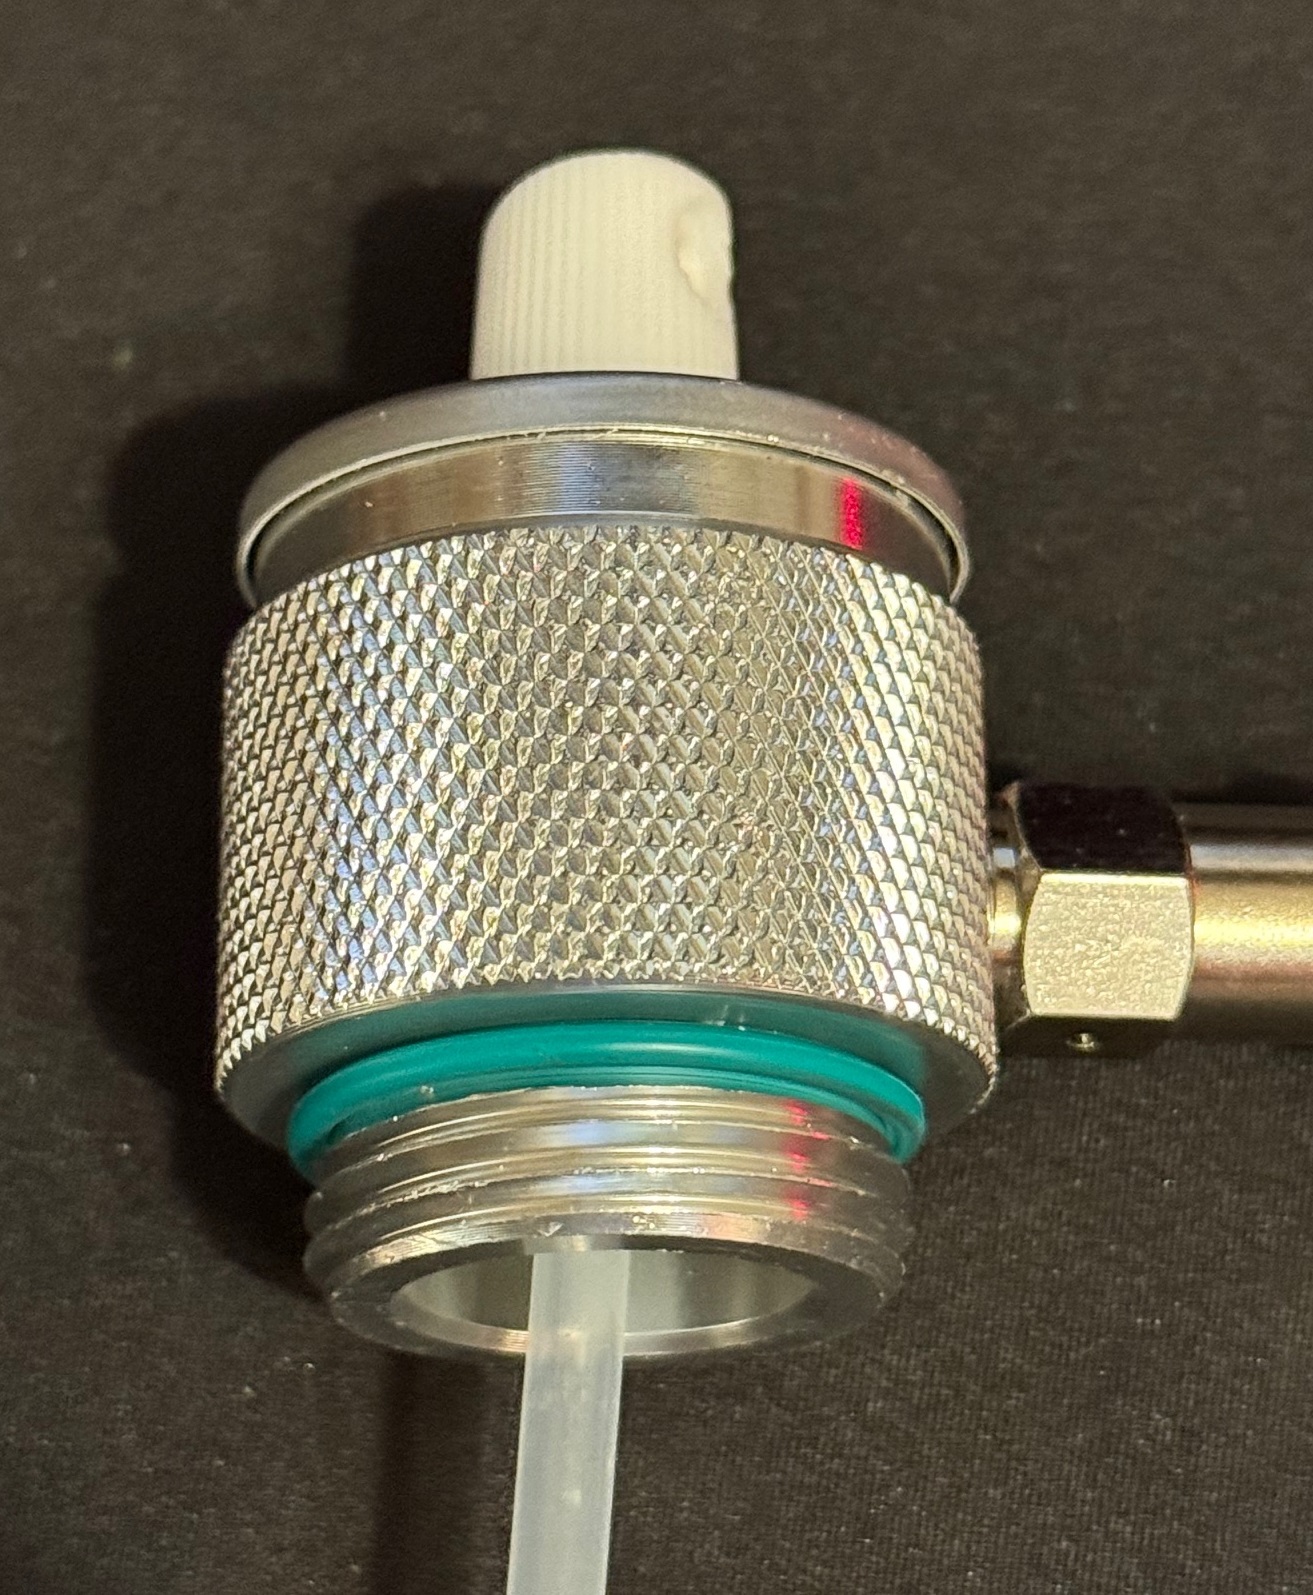
Click the picture for an enlarged close up view. If it’s the green one and you suspect the tank is loosing air there, see if you have this thicker red washer in the parts bag.
If yes, place it on the sprayer threaded connector like this:
It’s hard to tell from the pictures above but the red washer is twice the width. This next picture compares the two side by side.
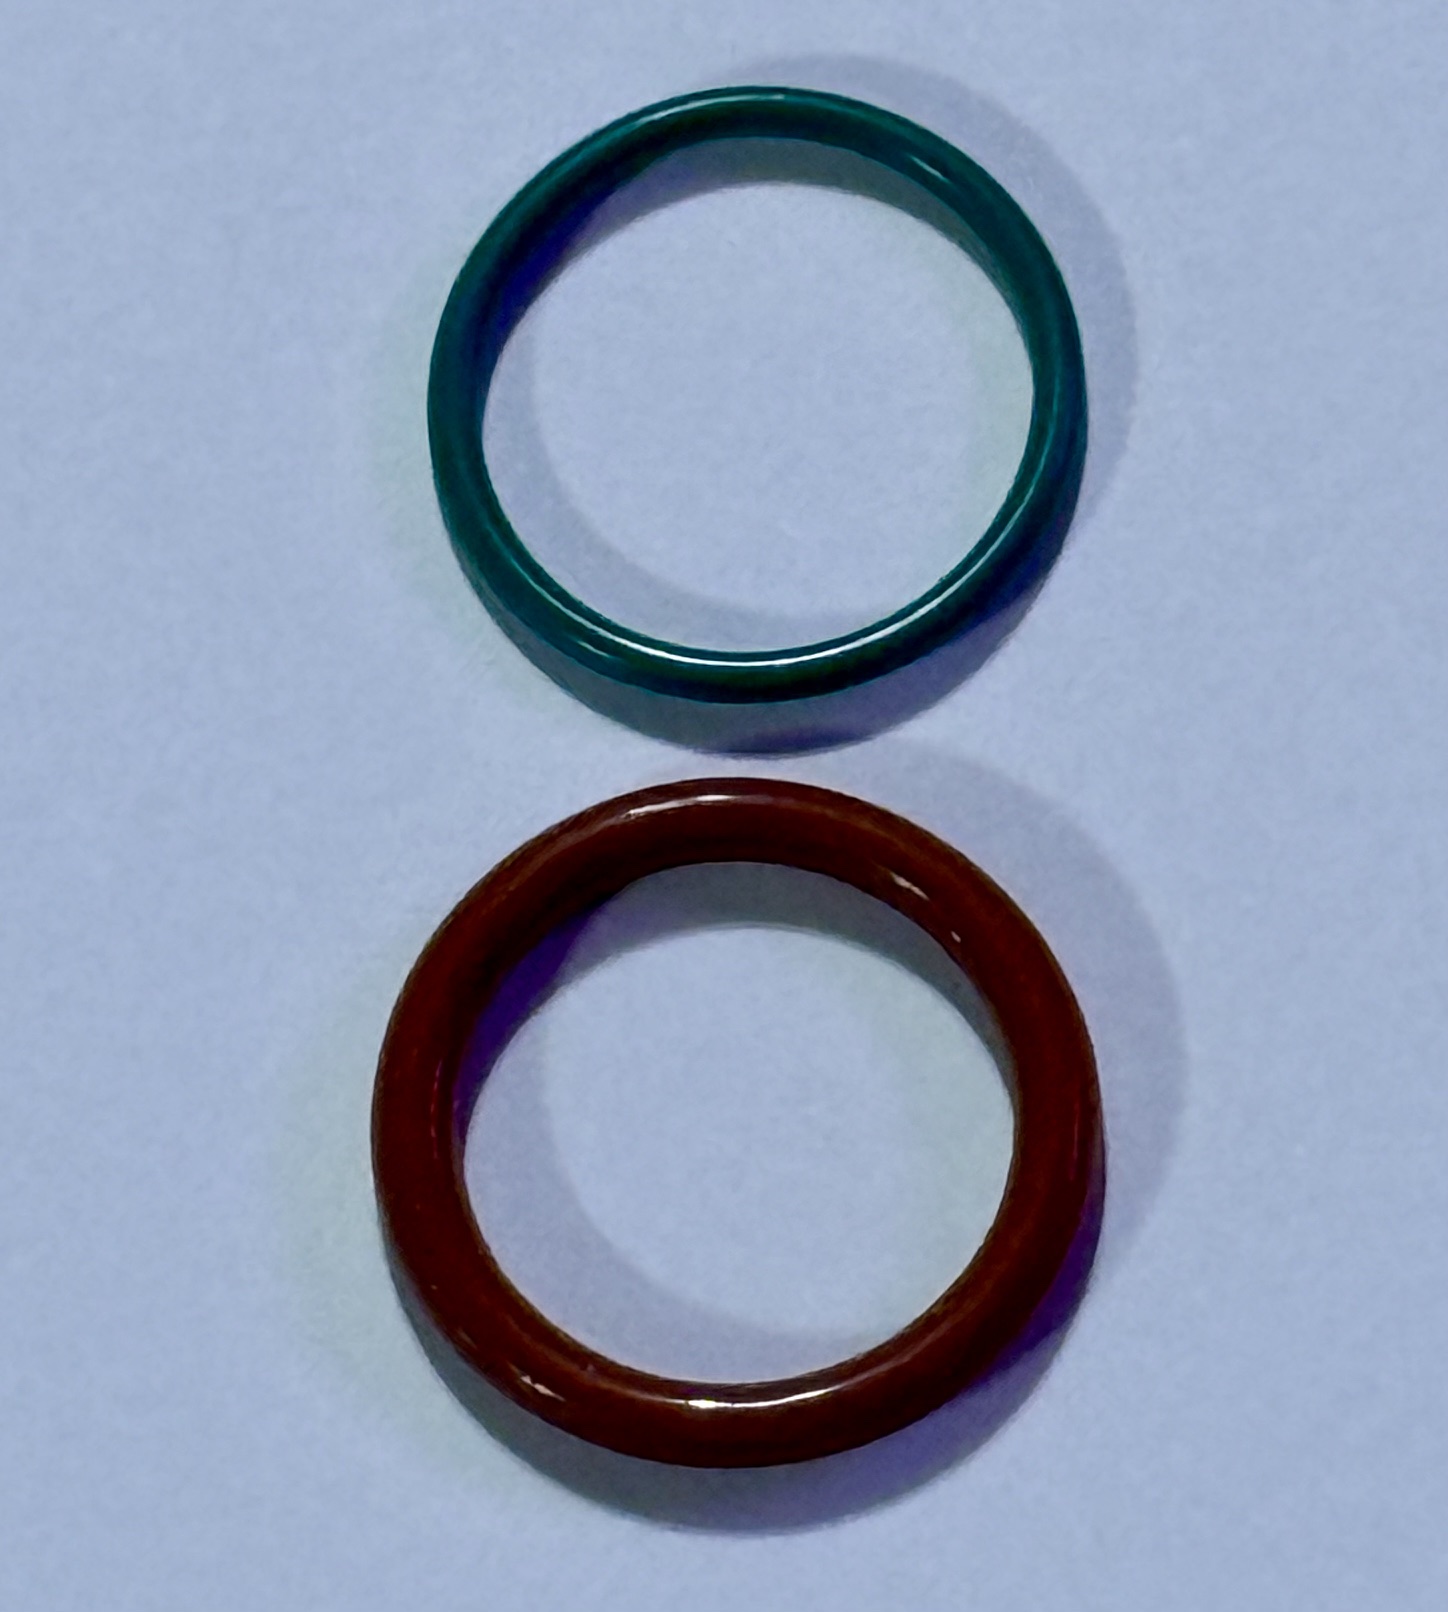
As you can see, the red washer is notably thicker. If you cannot locate this thicker washer, let us know your order number and once you’re found in our system, we’ll send a few of the red ones to you free of charge.
AIR VALVE IS LEAKING AIR
The only other part of the system that might leak is where you attach your air pump. Known as a Schrader Air Valve, it’s the same design you will find on most any car or bicycle tire.
These valves are replaceable (there should be two in your replacement parts baggie) AND we have found they tend to get loose.
To see if your valve is leaking, you can apply some of the water/dish detergent mixture to the hole at the tip of the valve to see if bubbles form. If it does, you’ll need to utilize the red Air Valve Tool included with your replacement parts kit.
![]()
Use the small end of the Air Valve tool to tighten the valve stem. The “notch” of the tool will fit over the air valve and allow you to turn it in two directions when properly inserted.
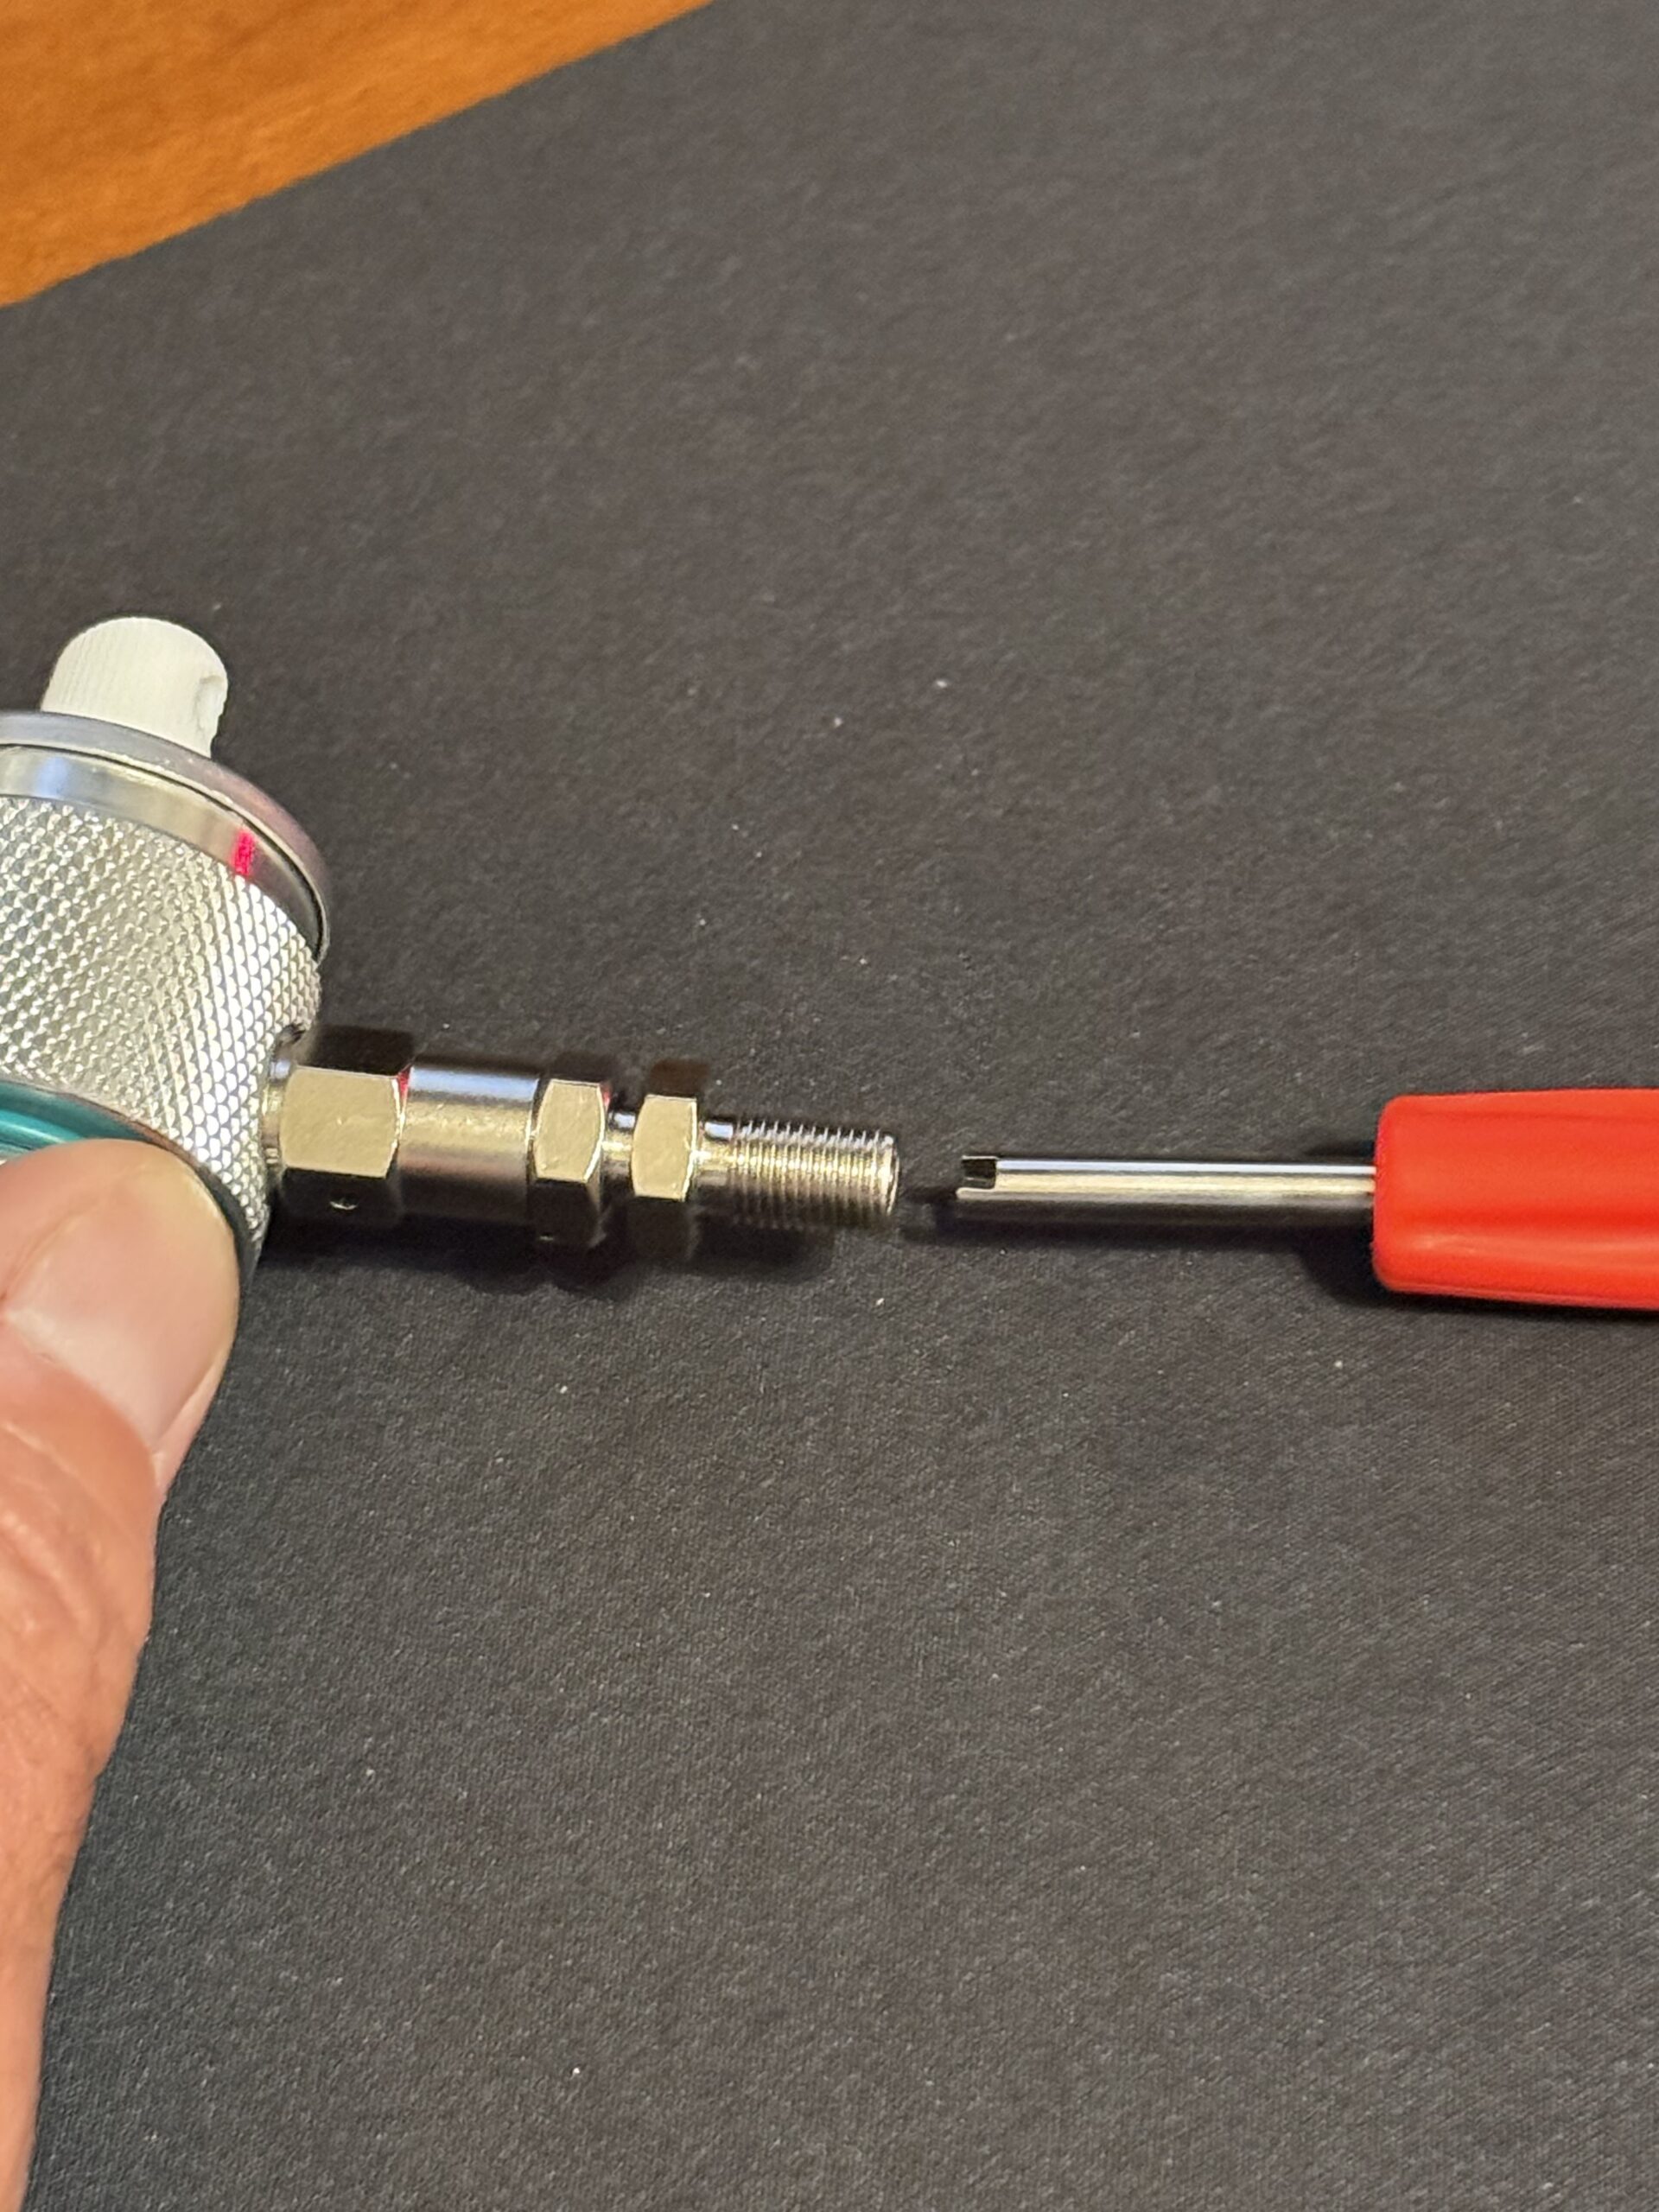
You’ll need to slide the small end of the tool into the valve stem and then get the notch of the tool fitted over the valve which is rectangular is shape. Once the valve is fitted in the tool, gently twist clockwise to make it tight.
These valves routinely vibrate loose during transit or they can come undone after several tank charges. They also use a small O-Ring that can get damaged so if you tighten the valve stem but find it continues to leak, replace the bad valve by unscrewing it and then install a new one (from the replacement parts baggie).
Air Valves are not likely to be “bad” out of the box BUT they are the number one location that leaks because they arrive a bit “loose”.
Now if you are certain yours is leaking at the valve stem AND it still leaks after following the steps above, contact Tech Support.
POWER INJECTOR SPUTTERS WHEN SPRAYING
This generally happens if the valve stem or nozzle is clogged. If you haven’t been consistently rinsing the tank AND pumping through clear water or base oil after every use, the spray system can clog. Think of it as “plaque”. Bithor or Maxxthor SC will tend to “settle” out in the tank and so it’s very important to shake the tank prior to use even if it’s been sitting for just 5-10 minutes as you prepare an area to inject.
If the clog hasn’t hardened, it can be removed. The first step is to remove the main nozzle and look at the valve stem to see if it looks clogged.
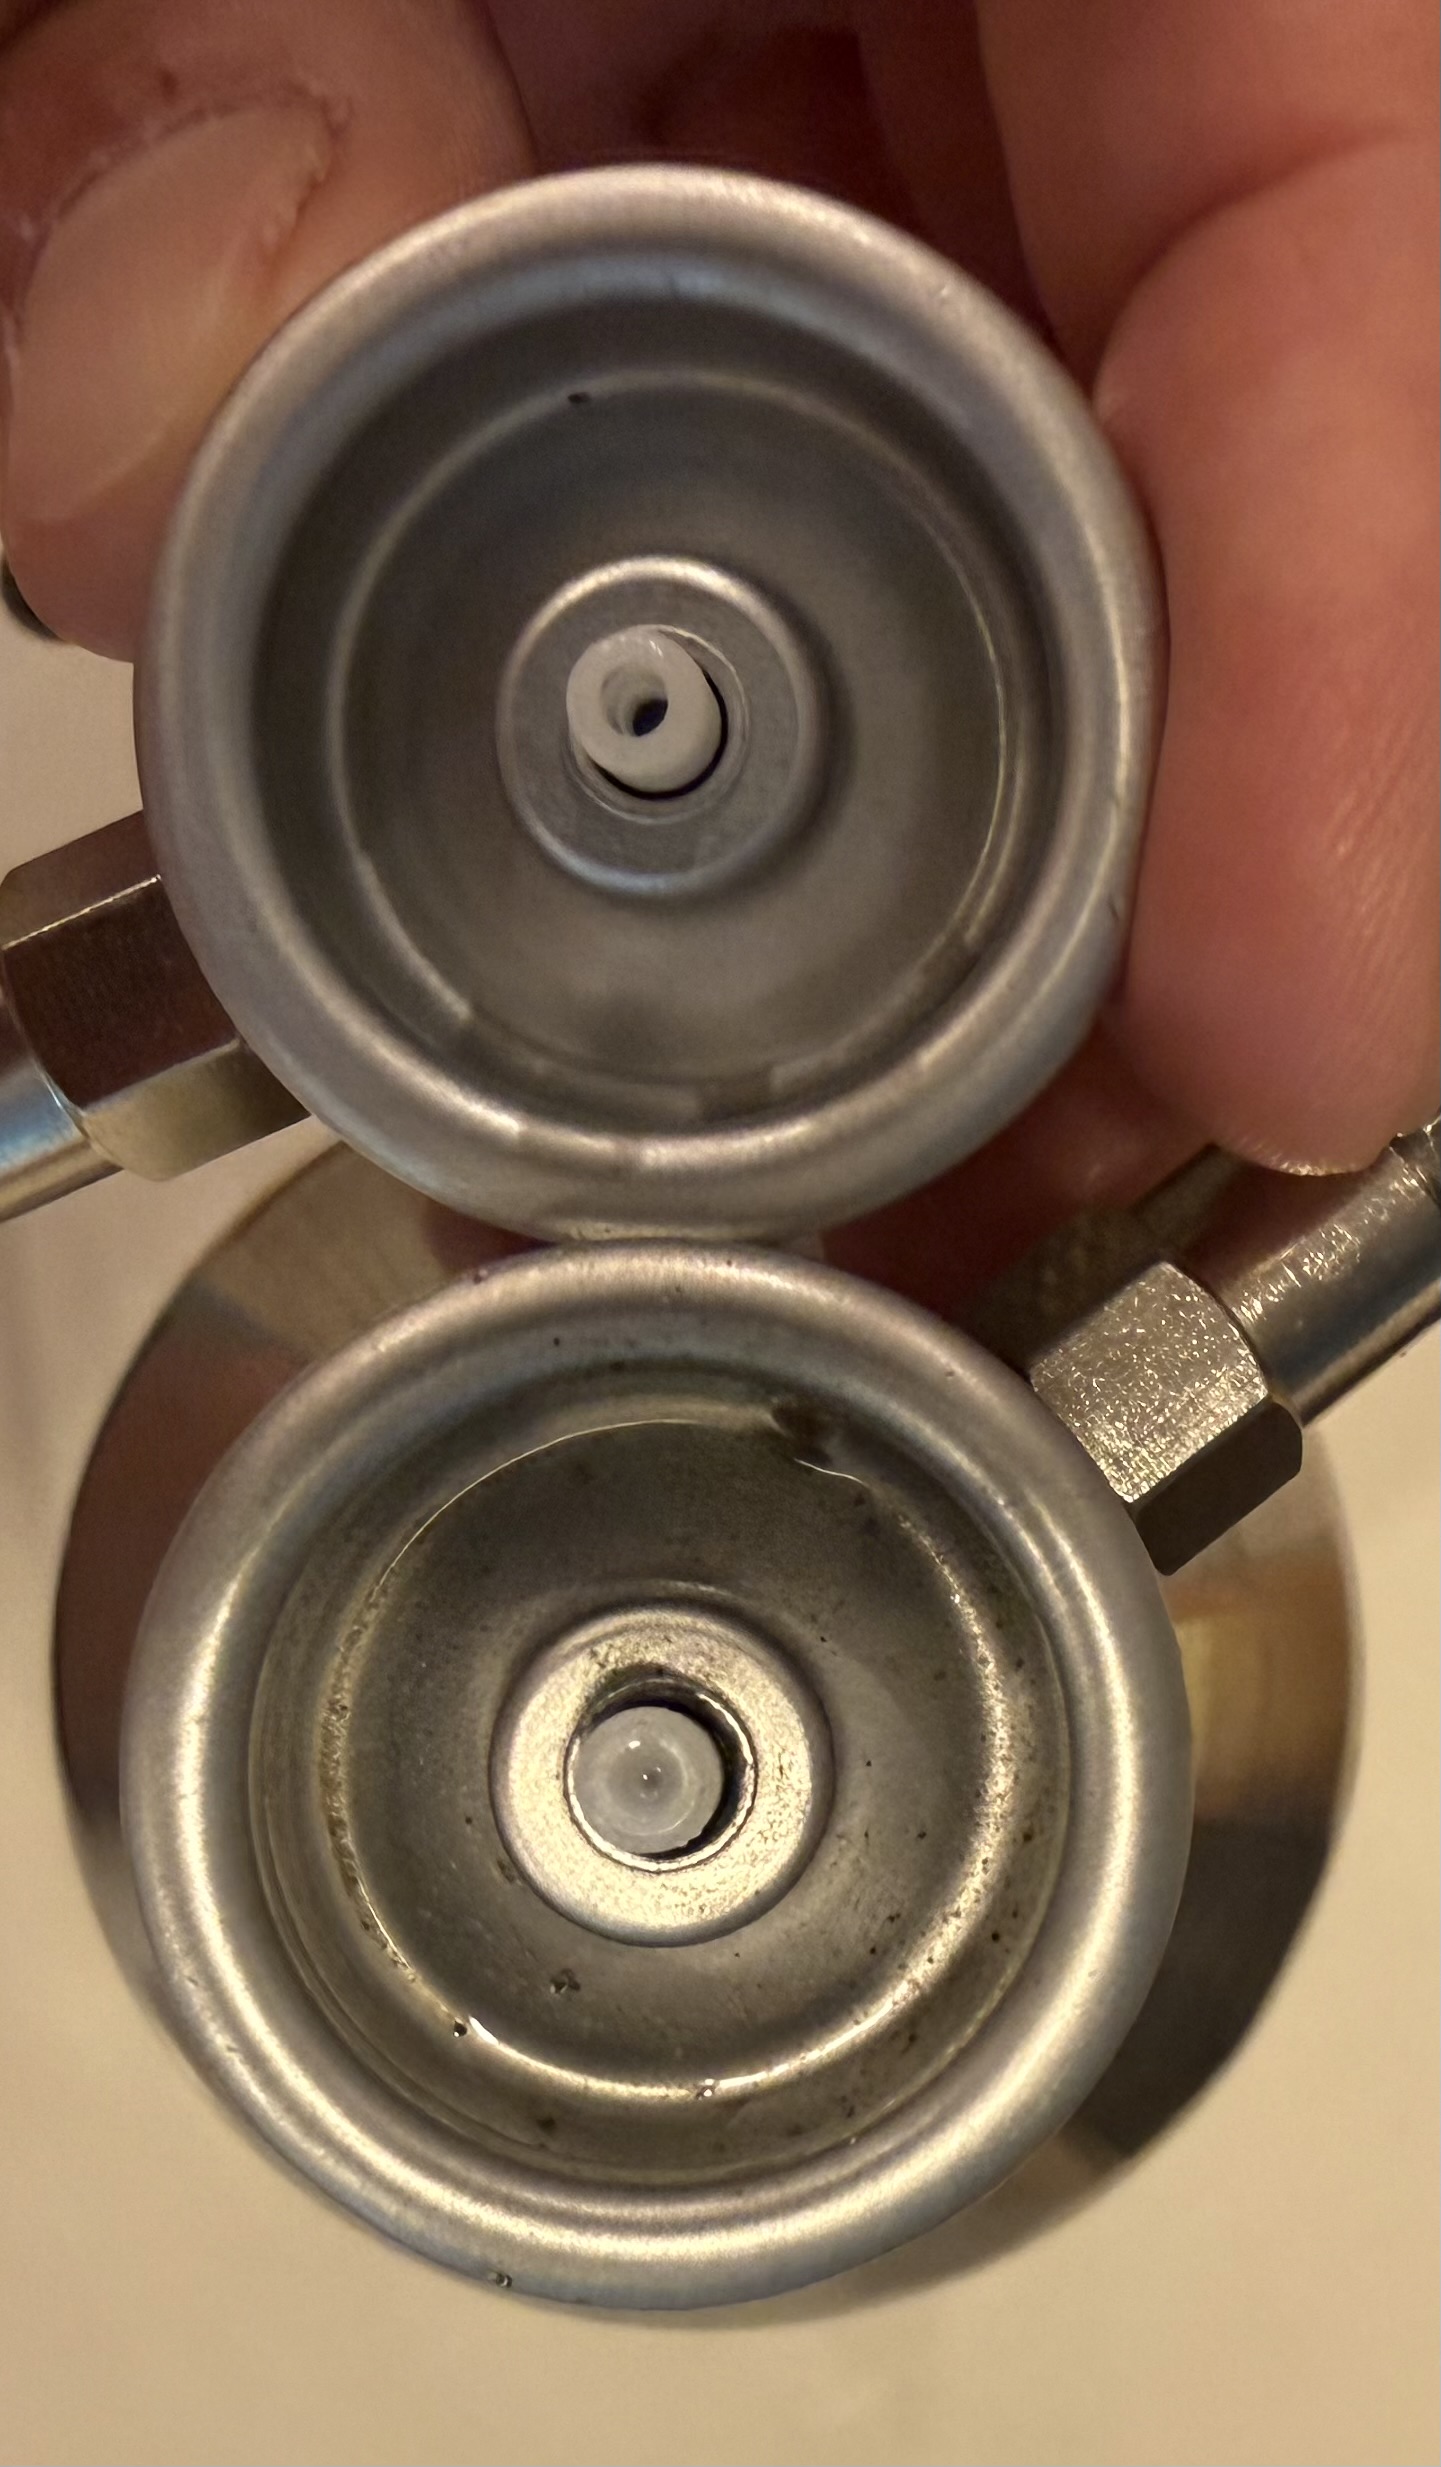
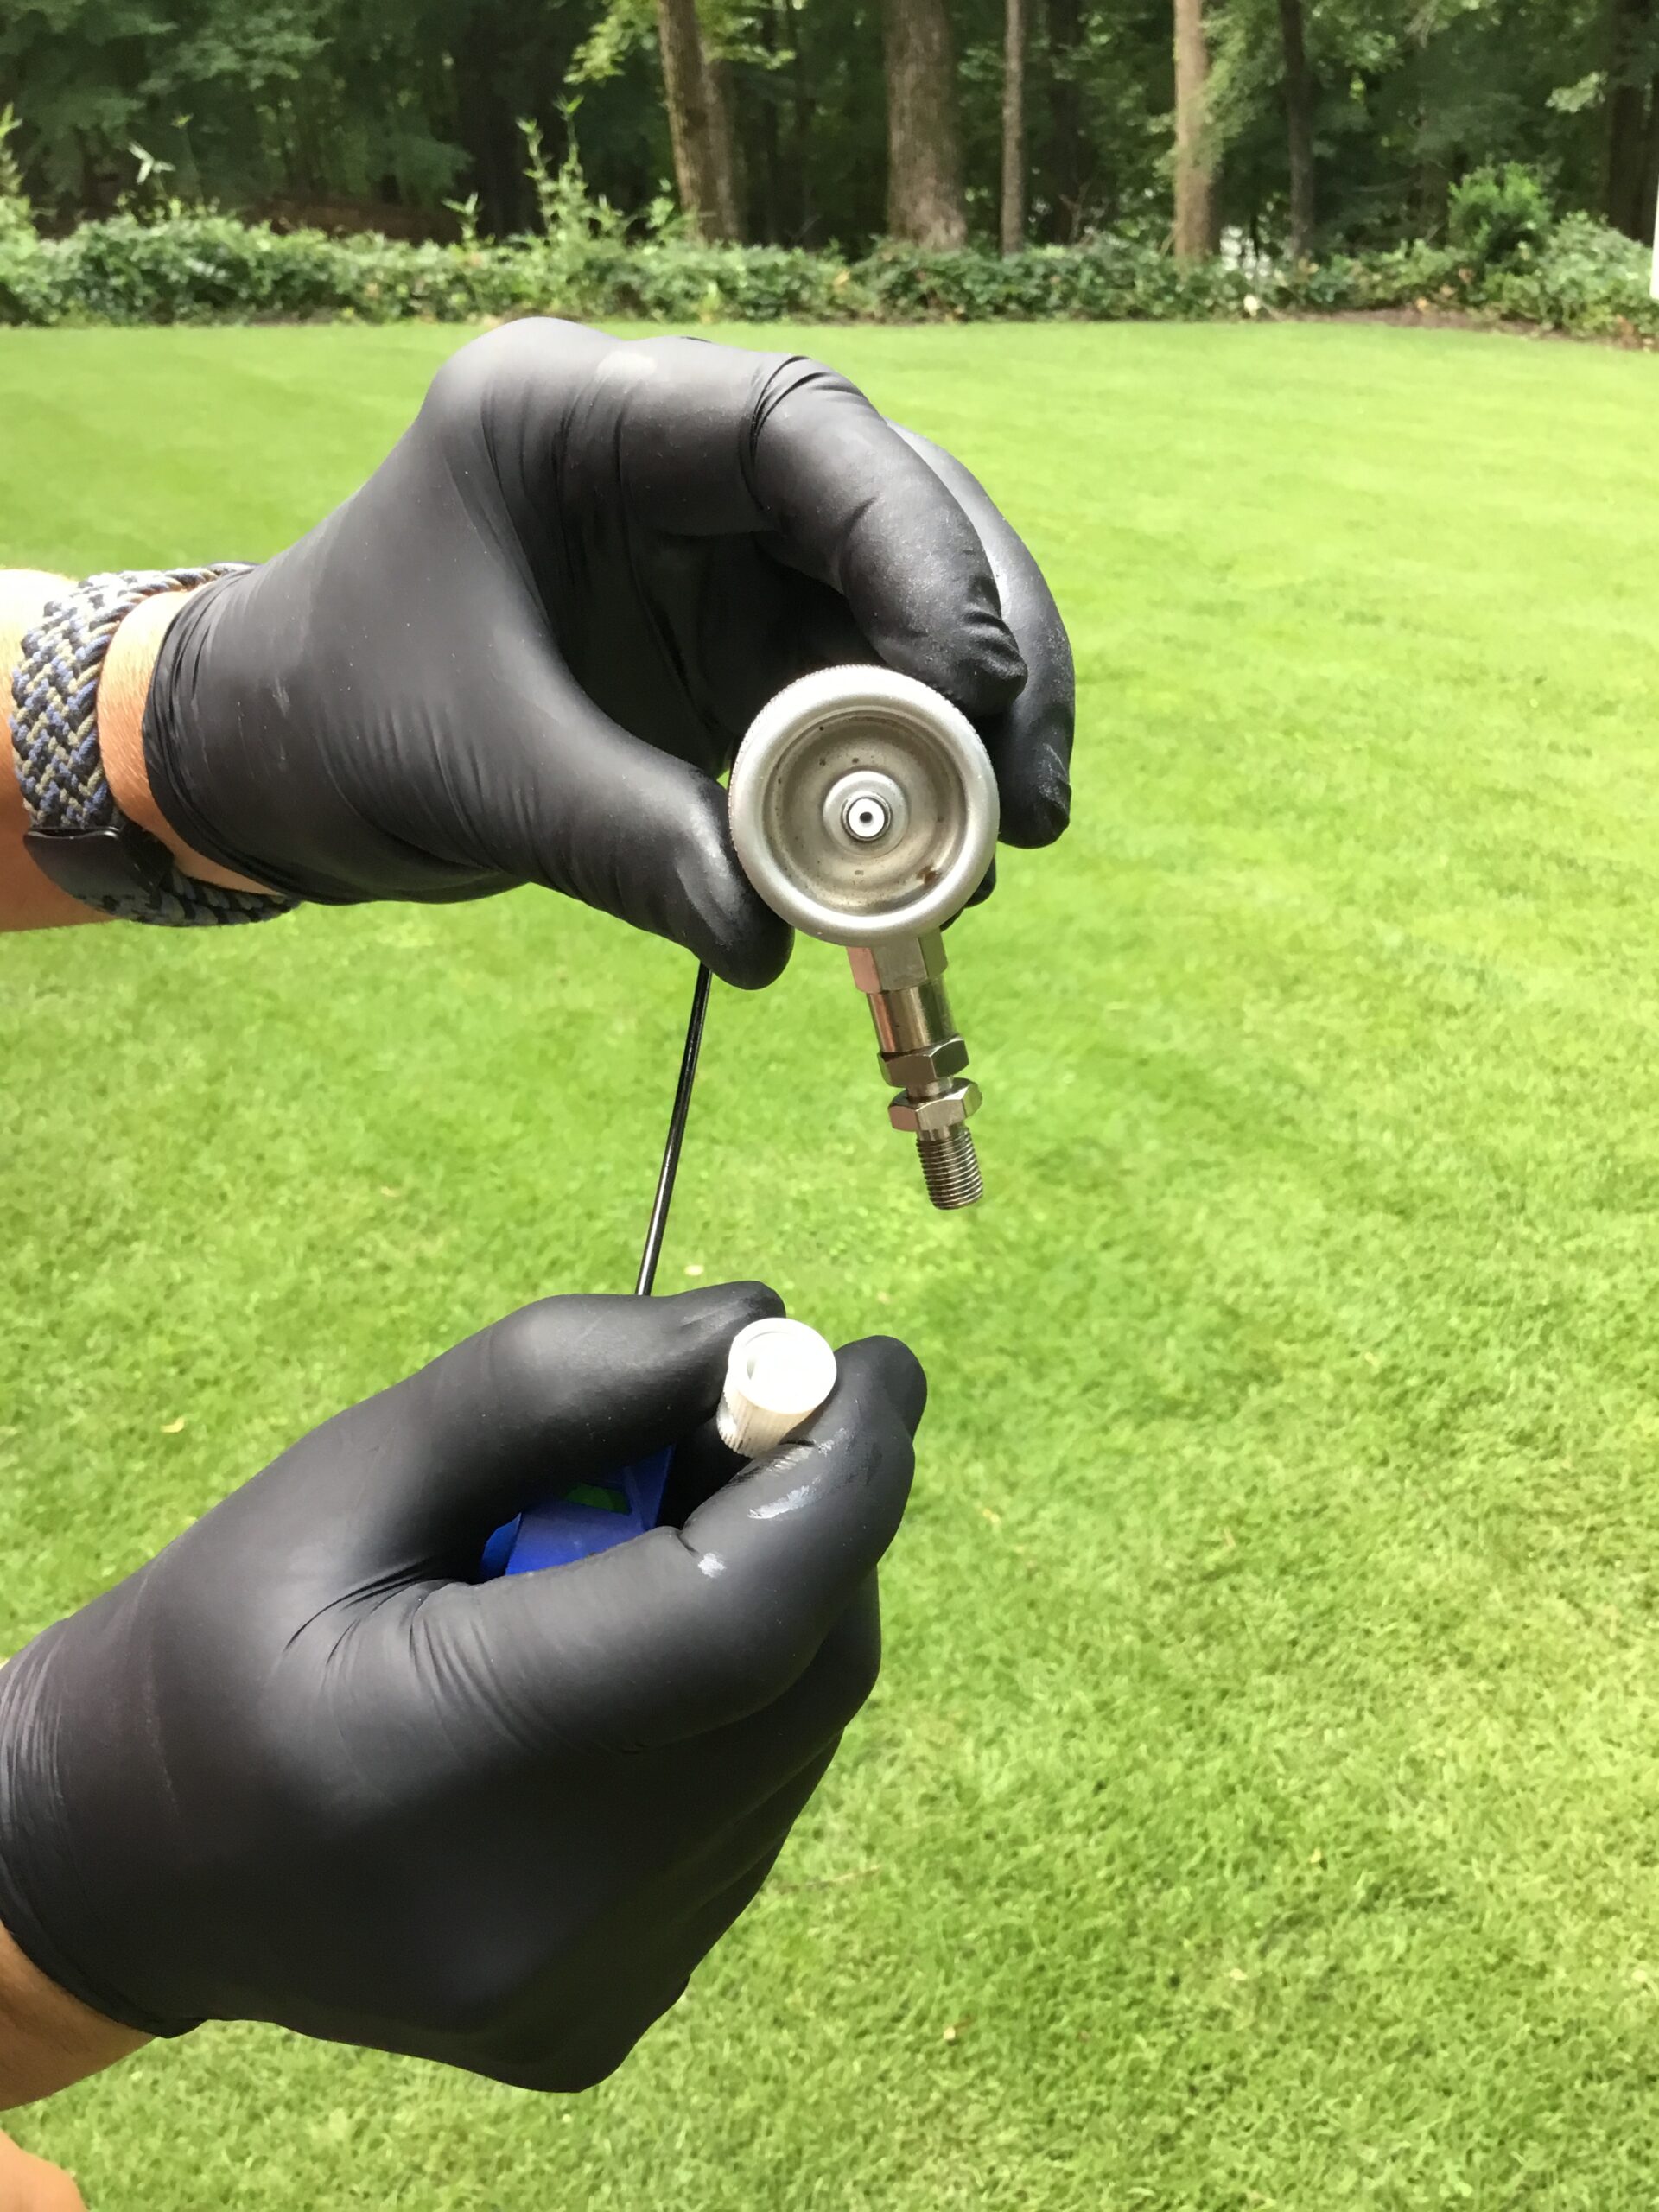
In this next image, you can see a clogged valve stem (on the bottom of the pic) compared to a wide open clear valve stem (the one pictured on top).
Since the mechanism “closes” by default, you can’t easily rinse water through the valve stem. This part of the sprayer lies below the valve stem and is not serviceable.
So what next?
Try a can of “air” to blow it clear. To do this, you’ll need a can of air that has a straw injection tube like the one in this next picture:
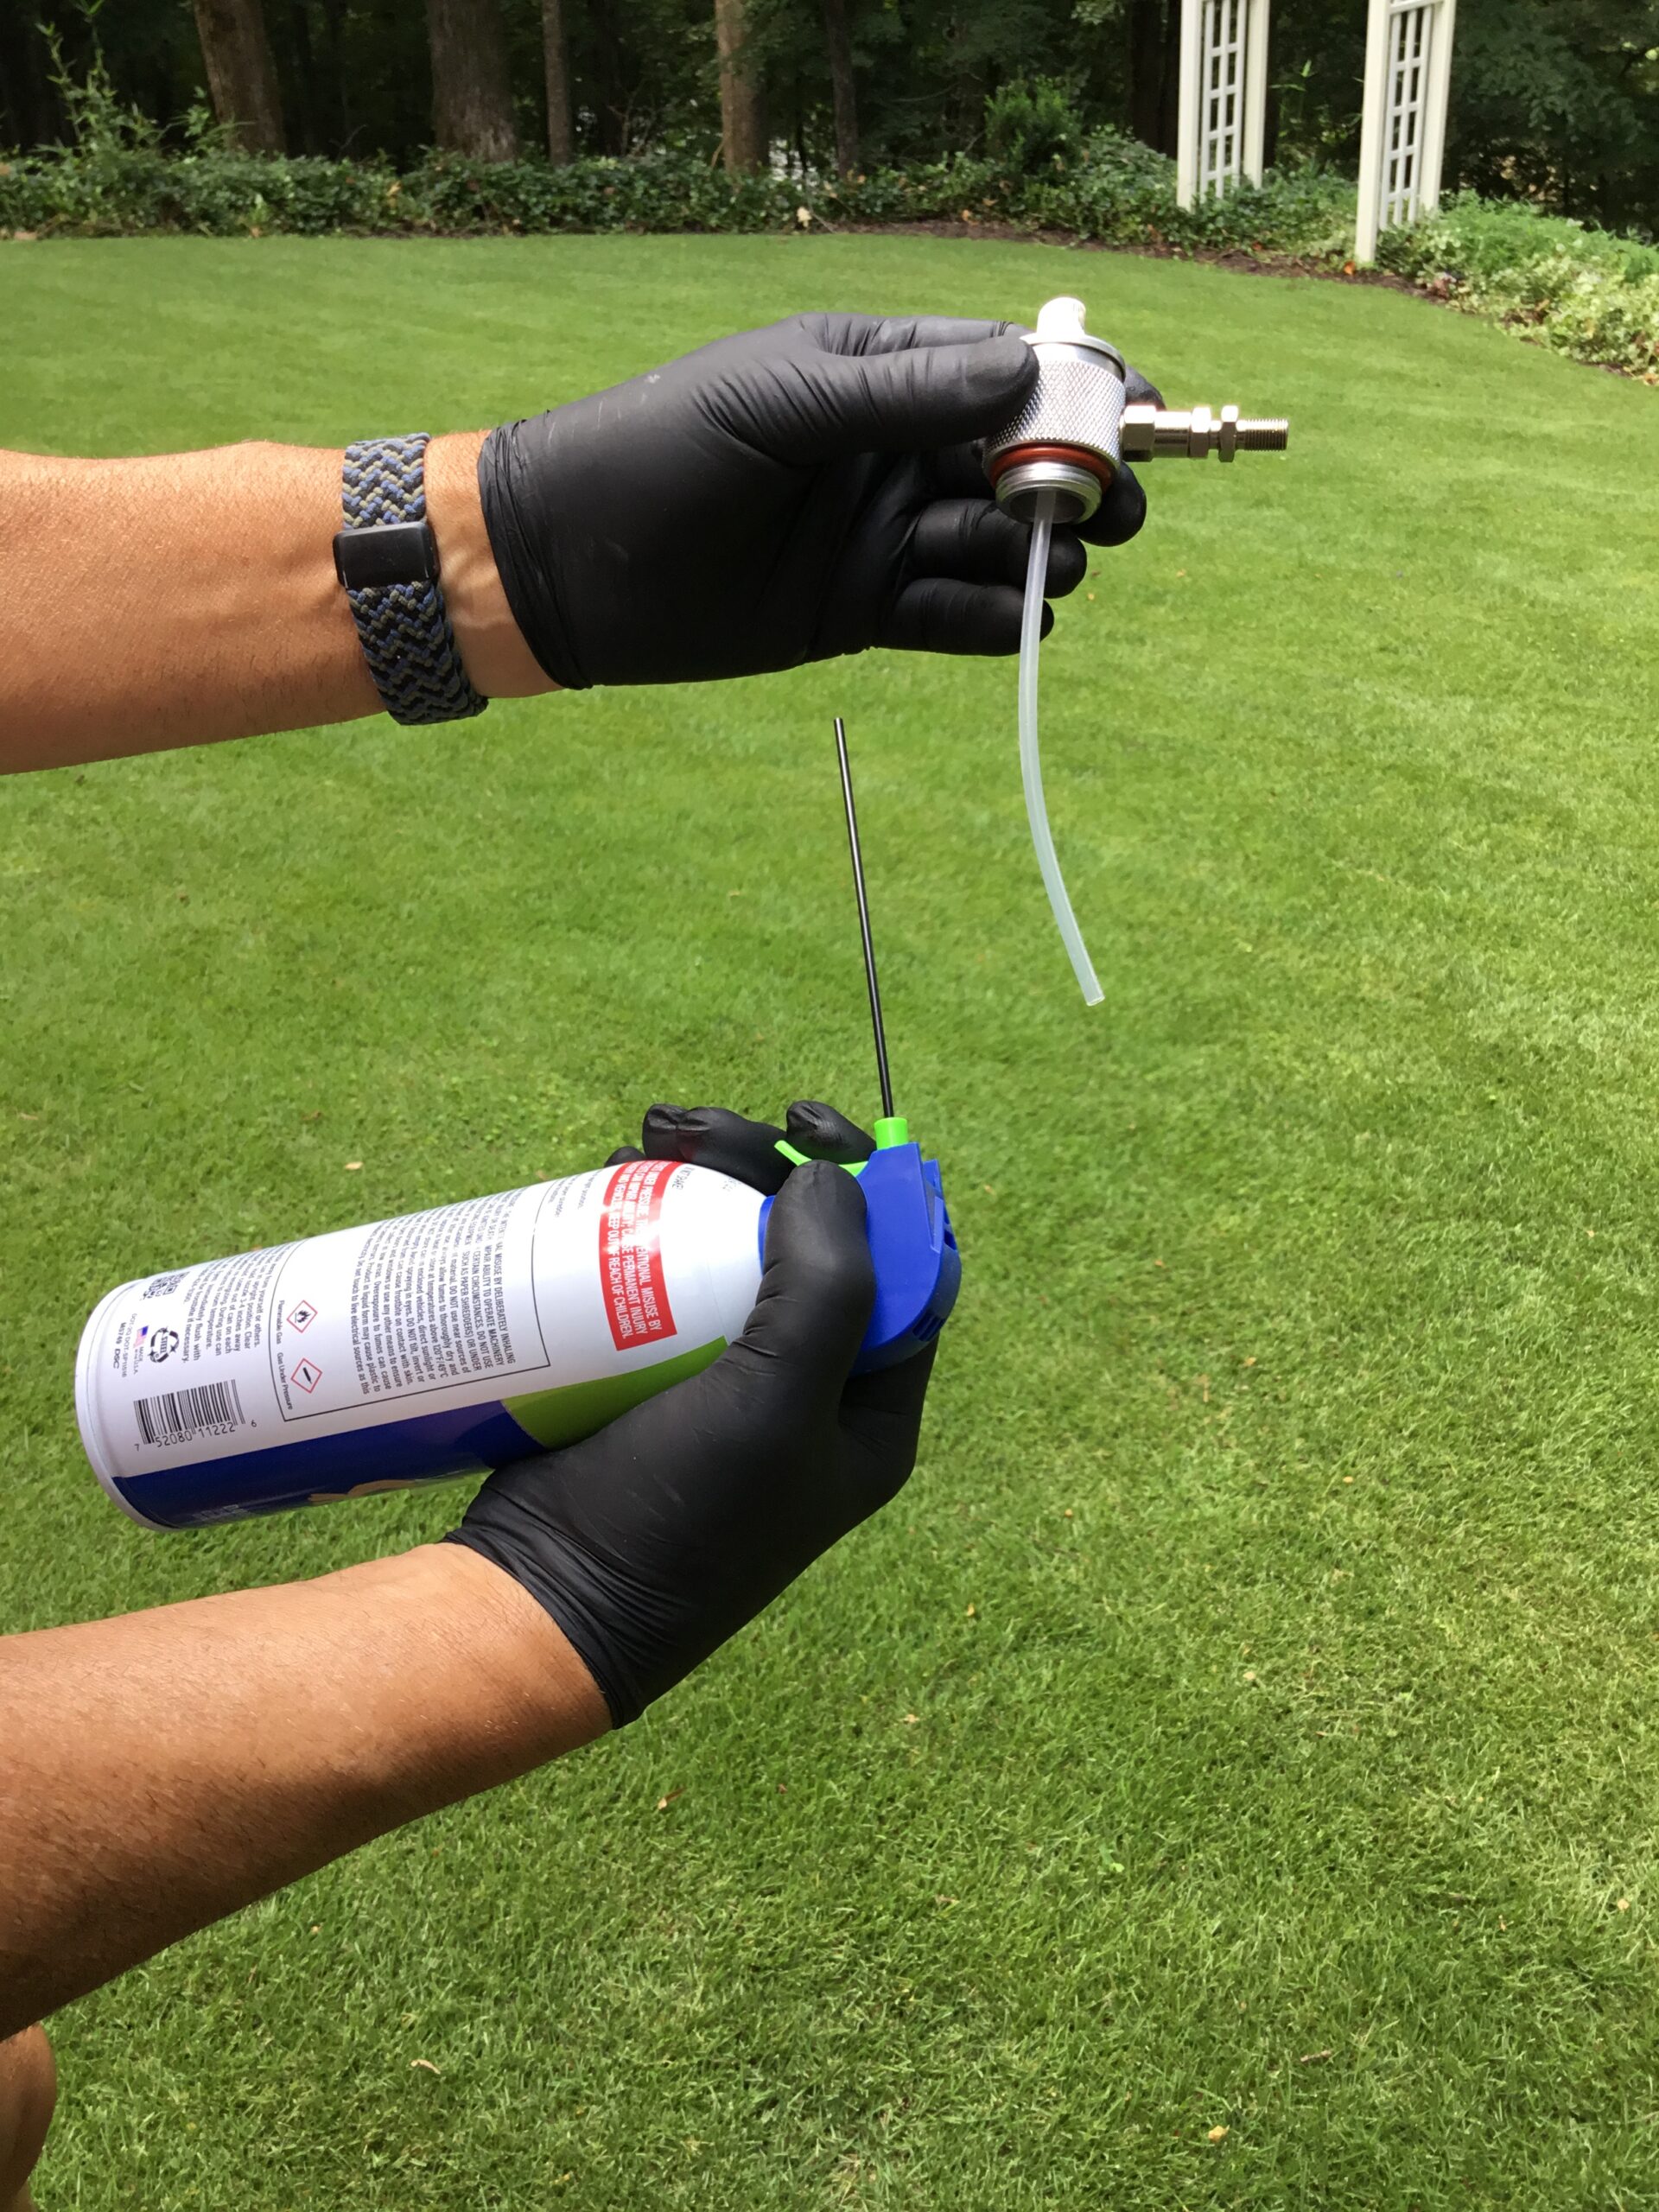
Next, make sure the Power Injector has the nozzle on it designed to hold the Injection Tube. Next, go ahead and insert the straw tube on the can of air “into” the Power Injectors suction tube like this:
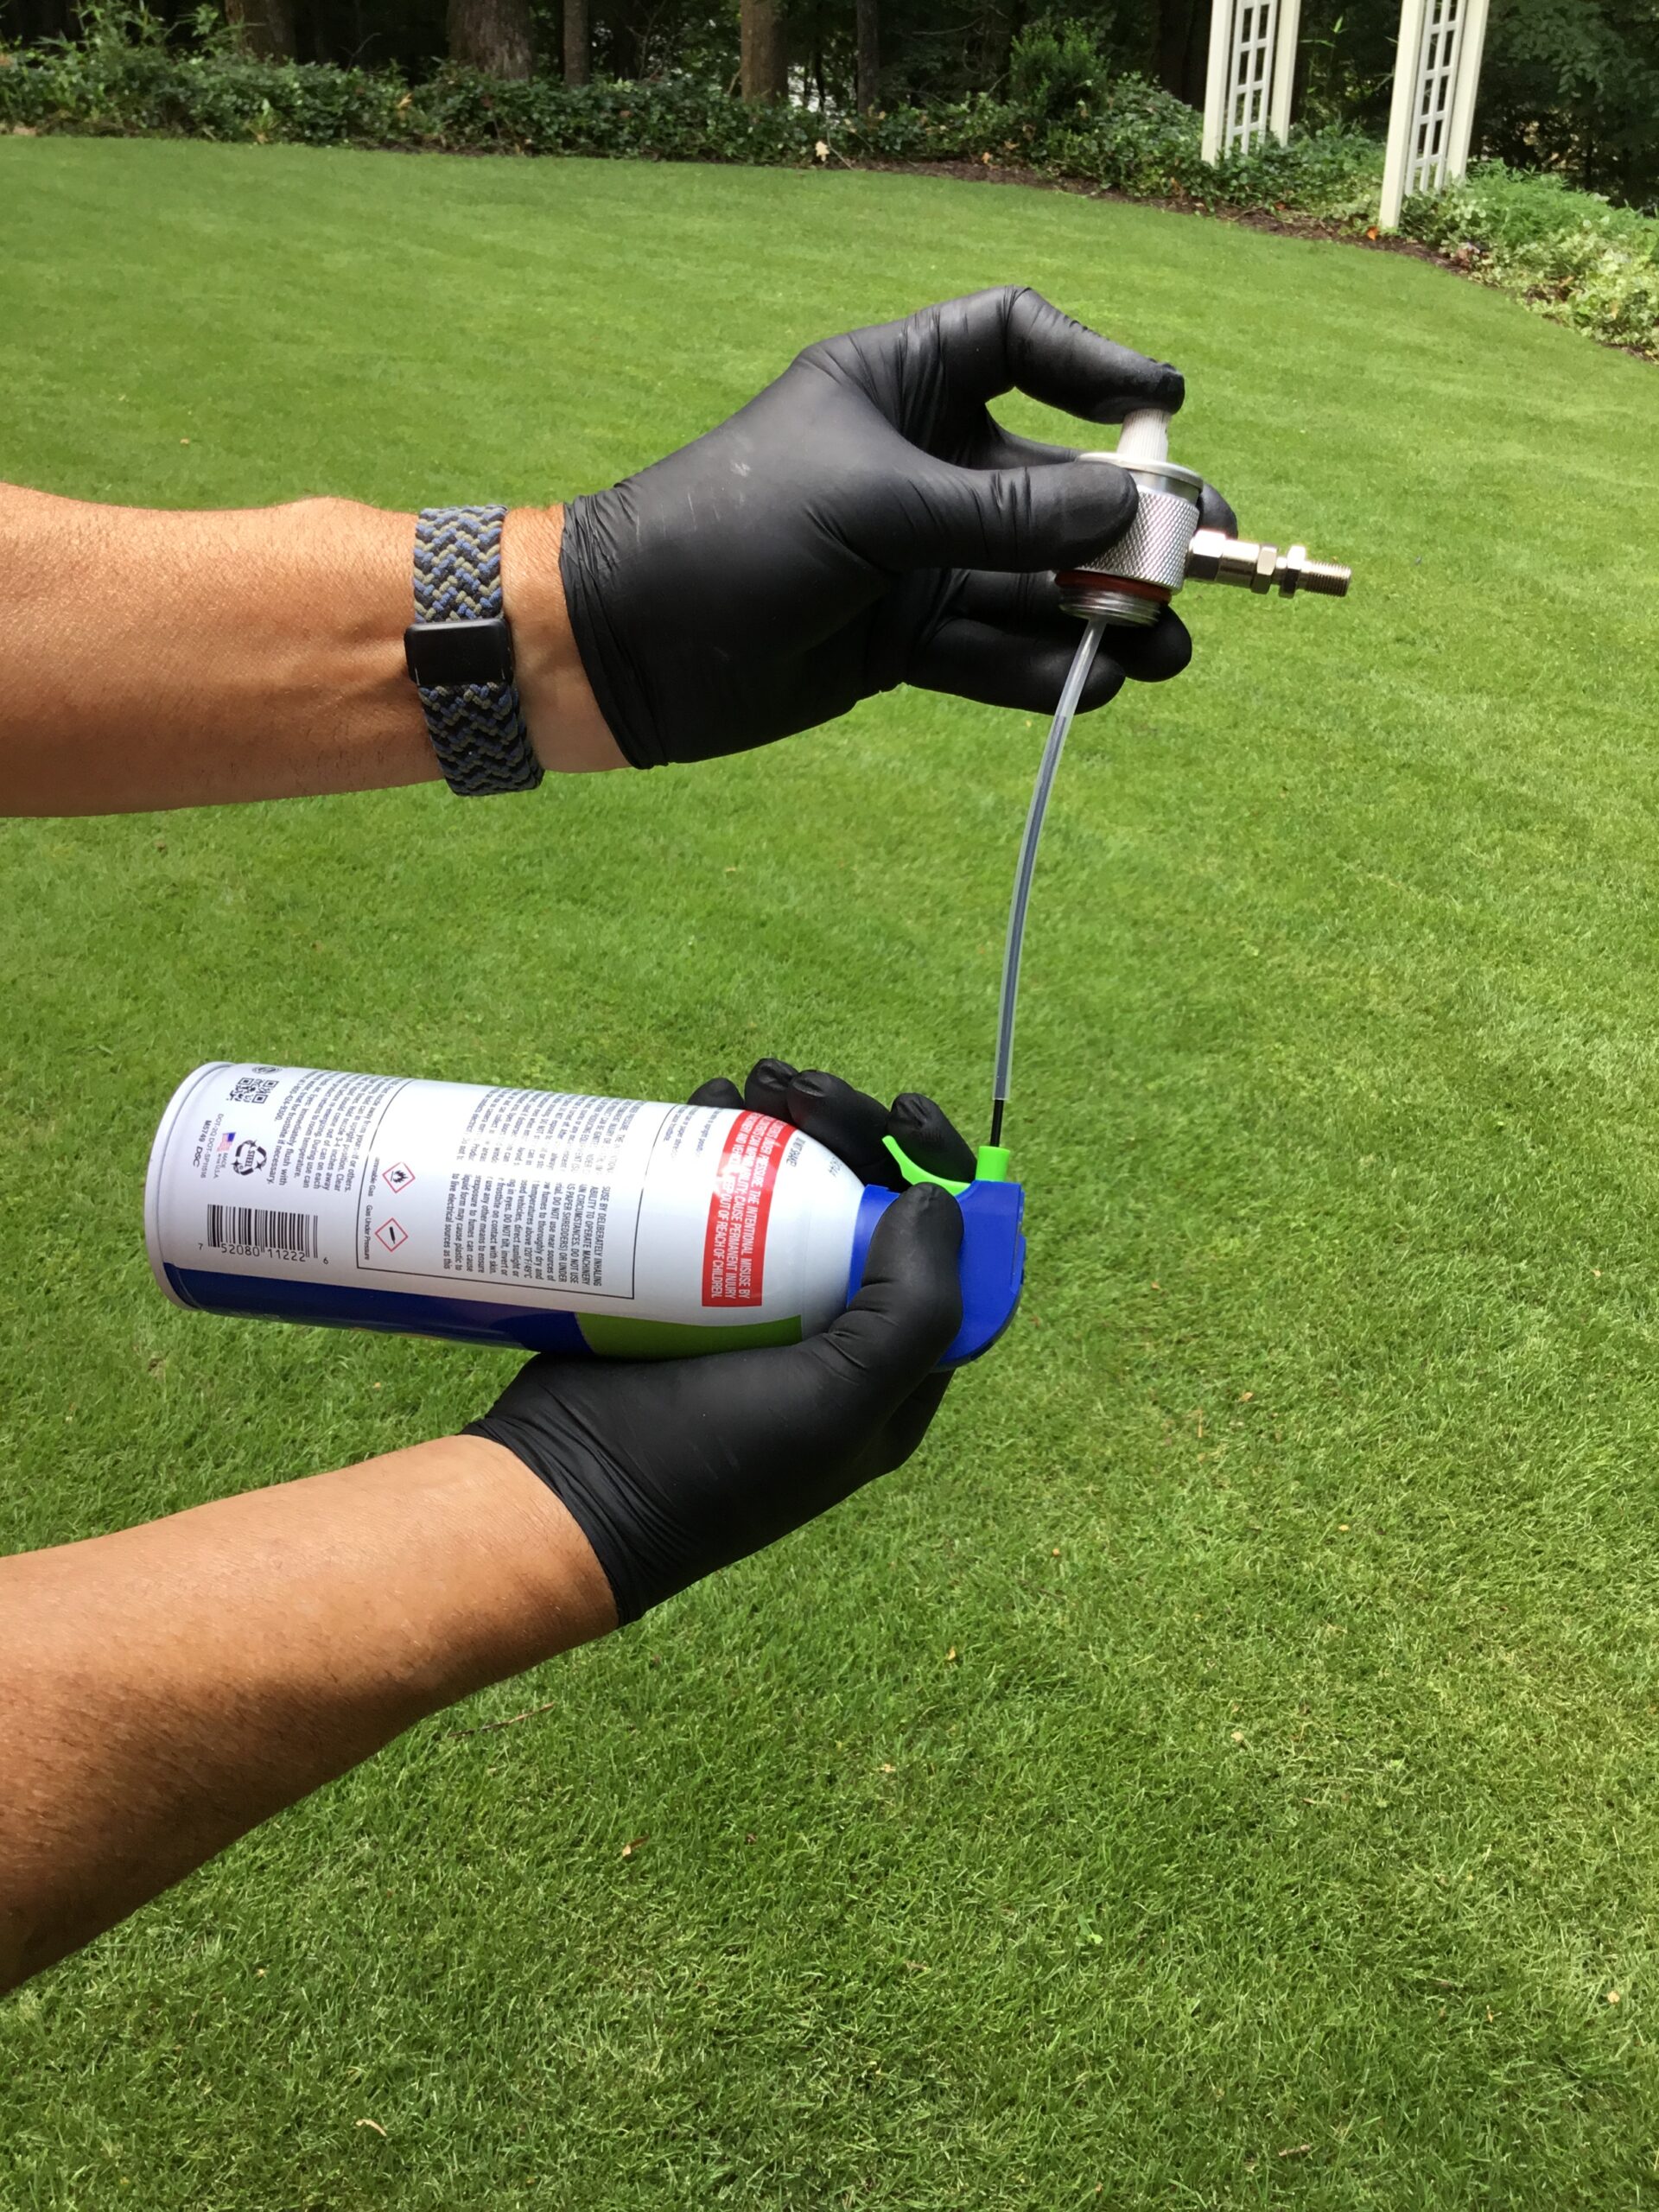
Next, PRESS THE POWER INJECTOR NOZZLE DOWN so the sprayer is effectively open so that air can pass through the valve stem and out the nozzle.
And then, while holding the nozzle of the Power Injector down, press the nozzle on the Can of Air for a good 2-3 seconds (or more). Then repeat 5-7 times.
Next, remove the can of air from the Power Injector’s suction tube and then remove the nozzle from the Power Injector. Give it a good look over attempting to see if the valve stem appears to be open and clear like you see in this next picture:
Do this as needed to remove the clog. It should come out within 1-2 cycles but try three times just to be sure. If this fails to dislodge the clog, the material inside could be so solidified that removing it with air may not work.
Your next step is to try leaving it under water to soak for 24 hours. Use warm to hot water and after 24-48 hours, use the can of air again to see if it can dislodge the clog. Letting it soak will often times help by dissolving the buildup just enough to allow the can of air to clear the passageway.
If this fails, try soaking it another 24 hours or having the sprayer replaced (it could be under warranty but if not, we do sell them separately).
Visit our POWER INJECTOR PARTS web page to get a new “sprayer only” for your system.
HANDY CAN AND INJECTION TUBE TIPS
*** ALWAYS REMOVE THE JET STREAM/INJECTION STRAW NOZZLE BEFORE ATTACHING RED STRAWS OR THE 50″ INJECTION TUBE ***
*** ALWAYS CHANGE NOZZLES WITH THE SPRAYER SYSTEM REMOVED FROM THE TANK SO YOU CAN ASSERT THE NEEDED FORCE TO INSURE PROPER NOZZLE FIT (SNUG AND LEAK FREE) ***
The white Jet Stream Nozzle will accept the 5″ Red Straws as well as the 50″ Injection Tube. But you need to remove the Nozzle from the Sprayer System before inserting any straw. If you attempt to fit a straw onto the nozzle while it’s still on the System, you will damage the internal valve stem!
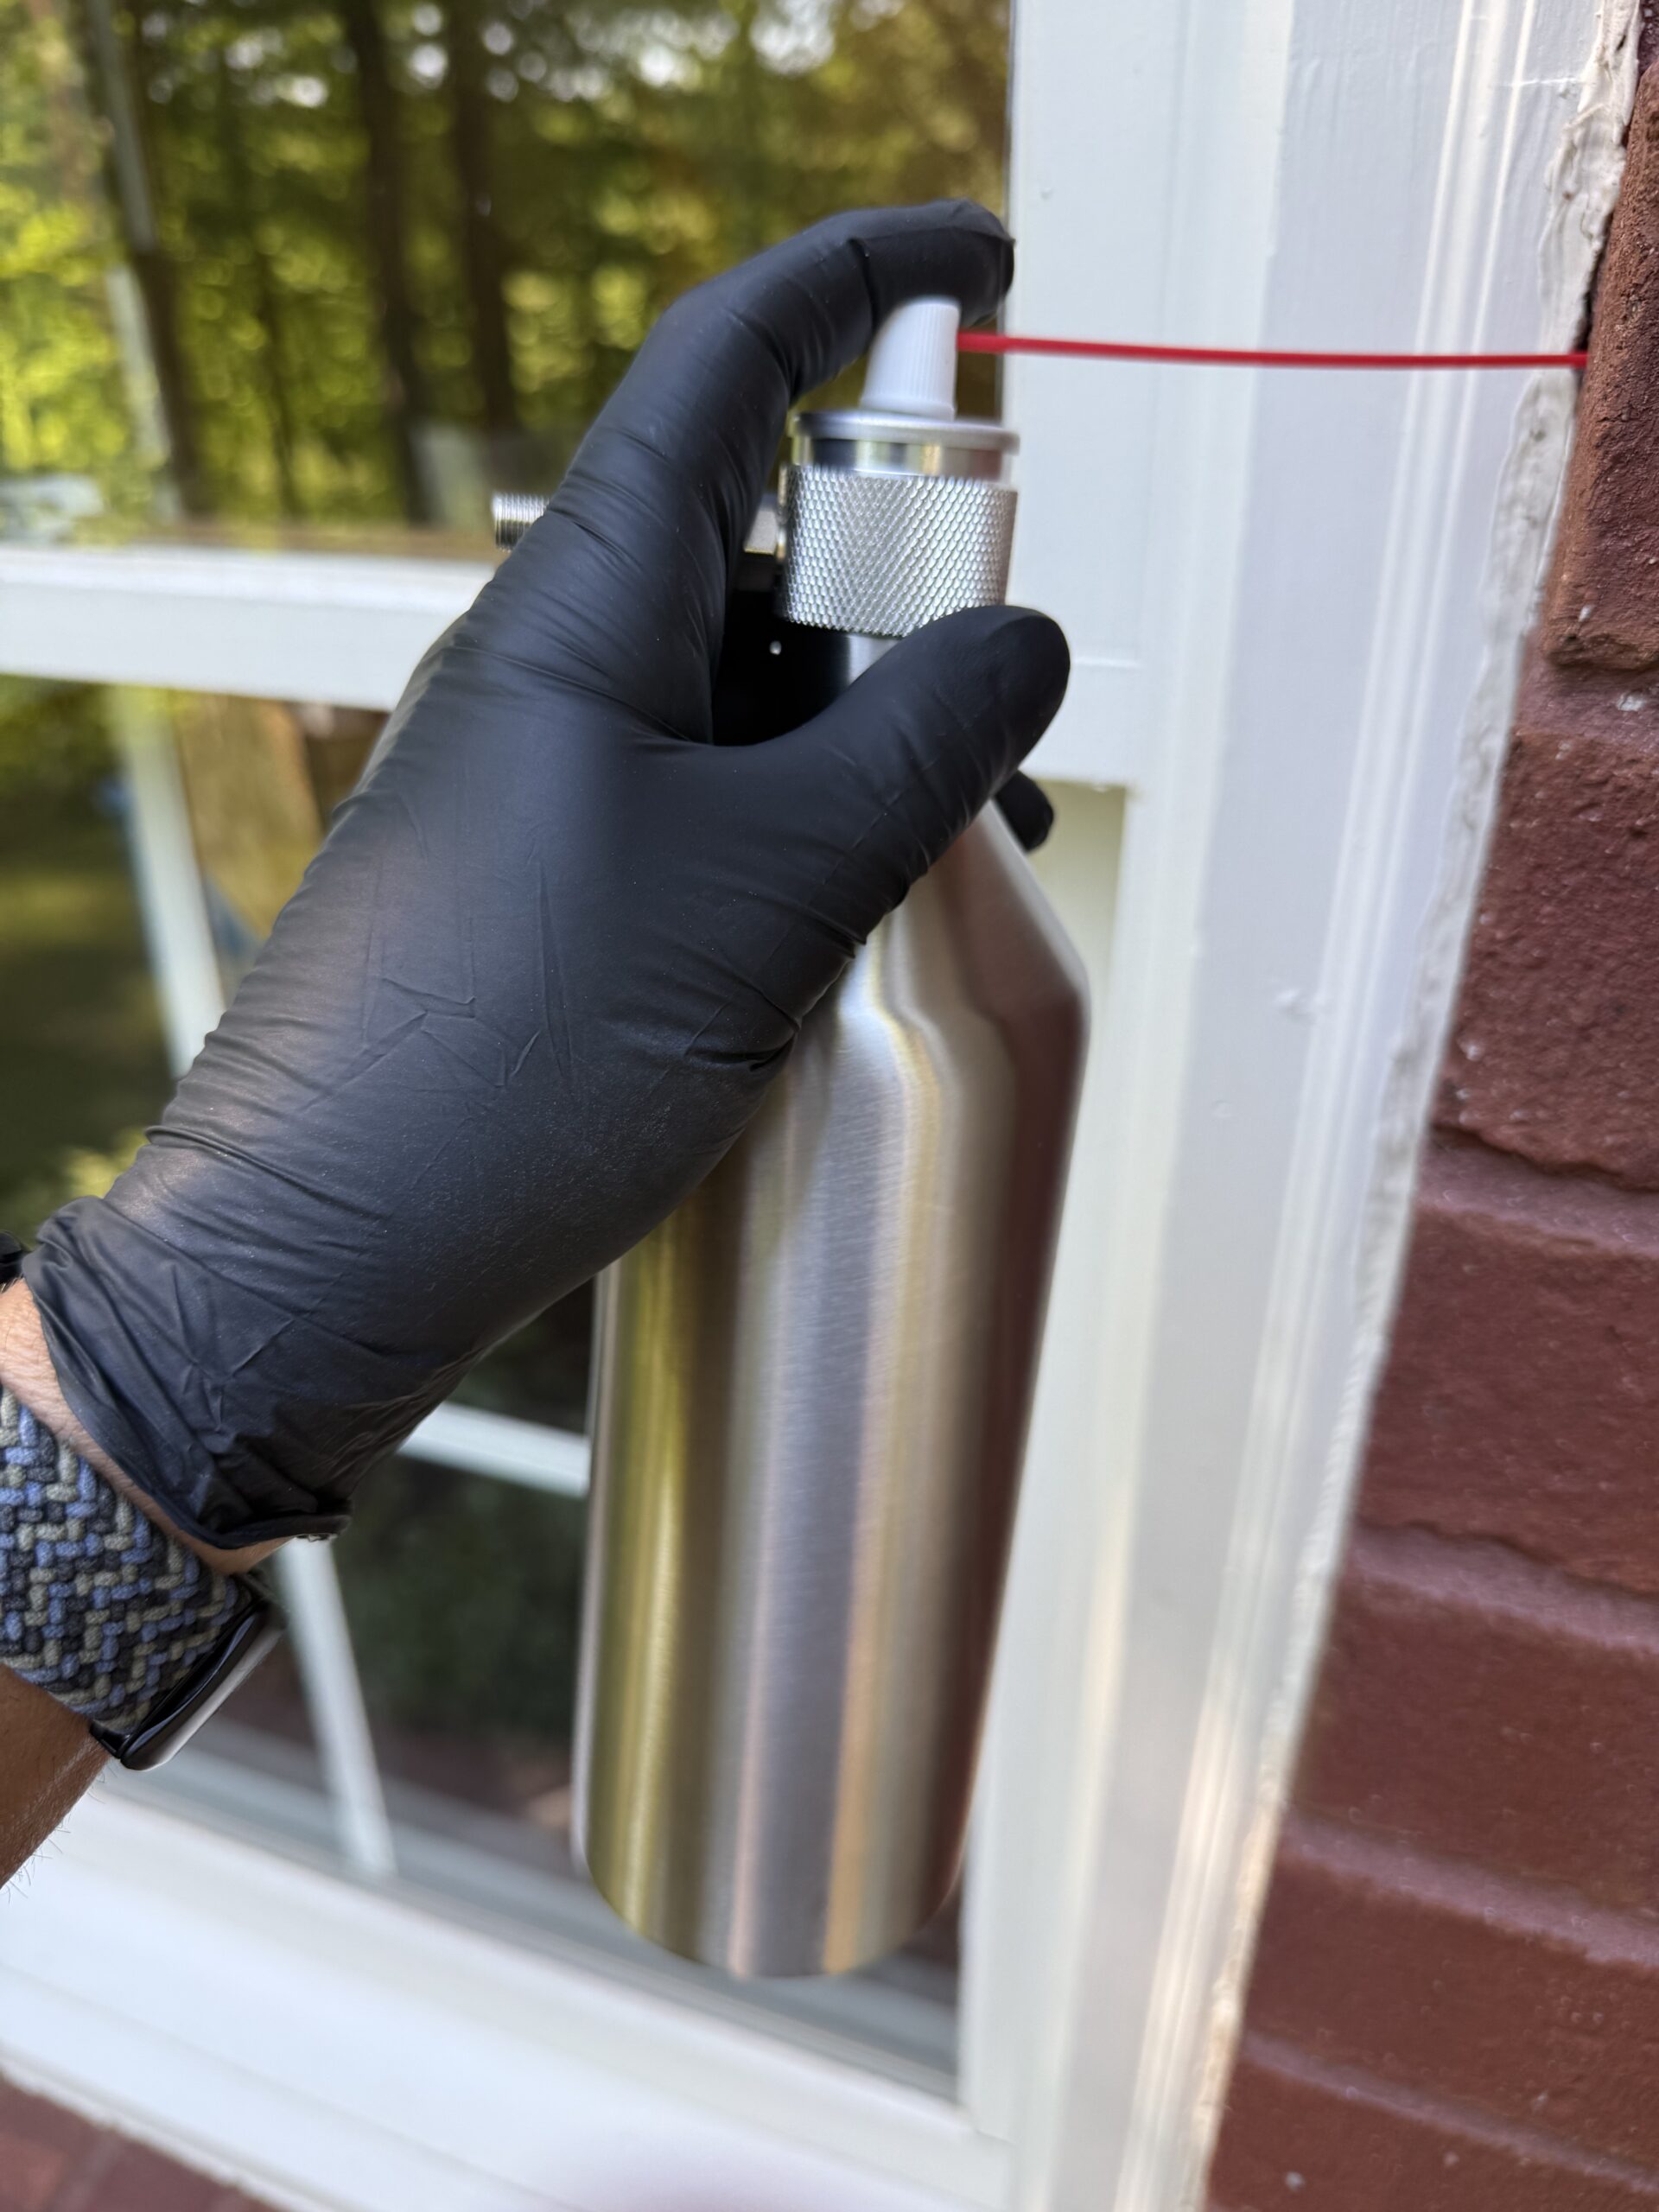
BEST HANDY CAN POSITION
When mounting the Handy Can to the tank, keep the Schrader Air Valve pointed toward the red trigger like this:
The Handy Can is designed to be “loose” when properly mounted. This insures it has plenty of room to be mounted and unmounted without damaging the Valve Stem.
The original fit was too snug which led to valve stem damage and accidental releases.
*** IT’S BEST TO USE THE HANDY CAN WHEN THE SYSTEM IS ON THE GROUND AND YOU ARE USING THE 50″ INJECTION TUBE AS SEEN ABOVE ***
If you need to use the 5″ Red Straws, remove the Handy Can and use your finger to spray. Keep the Air Valve pointed toward you so it can serve as an “anchor” for holding the tank as illustrated here:
*** ALWAYS WEAR RUBBER GLOVES WHEN POWER INJECTING AND IF YOU FIND ANY SECTION LEAKING, STOP TREATING AND FIX THE SYSTEM BEFORE CONTINUING WITH YOUR APPLICATION ***
Leave a Reply